Beacon SMS Workflows (v4.0+)
Beacon supports four different Responder Type workflows:
- Patient Transport
- Emergency Response only
- Animal Transport
- Transfers and Deliveries
Each Responder Type is sent all or some of the messages displayed here. This image below shows which messages are sent to which Responder Types.

IMPORTANT!
Download this PDF and follow the exercises to practice the message sequences that are sent to different Responder Types. (Please, trust us on this. Otherwise you might think messages are being skipped when they’re not.)
1. Incident Alert

Responders receive a Request for Assistance from Beacon indicating the Incident Number and the Location of the incident. If a Responder can respond, they should reply with the Incident Number and the number of minutes it will take them to arrive to the location. The values must be separated by a ” . “ (see example at left). You will have between 2-3 minutes* from the moment the alert is created to confirm your participation. Depending on the Responder’s distance from the incident, they may be told to proceed to location, standby or that their participation isn’t needed.
*Actual times depend on your agency’s protocols and are set by your Administrator on the Beacon web pages (Read more here).
2. En Route

After you have been assigned to an incident:
- Send 1 to inform dispatchers that you are on your way to the location
- Send 0 to inform dispatchers that you have canceled your participation in the incident
3. On Scene

4. Additional Resources

The Responder to arrive on scene first is considered the “Incident Commander” (IC) and is given the option to request additional resources when needed. For example, one patient with a broken leg could be treated and managed by 2-3 Responders, while a bus accident with multiple casualties would need more help. In order to assist the decision-making process, the IC is told at the beginning of the text how many other Responders are currently en route (including yourself) and their estimated time of arrival in minutes (4 mins for Engine 6; “0” mins means Ambulance 414 is already on scene).
- Send 0 if no additional resources are needed
- If additional resources are needed, the Responder replies with the number of resources needed indicates the number needed — e.g., 4 if four more vehicles were needed. (Do not send #4 as # will not be acknowledged by the system)
5. Patient Transport

Responders confirm that they are transporting patients by indicating the destination facility they’ll be transporting to, the number of patients they’ll be transporting, and their estimated time of arrival in minutes (ETA). In this case, there are four possible transport destinations (i.e., hospitals).
- The Responder sends 2 for Georgetown Hospital, 1 to indicate they are transporting one patient, and 20 for their ETA in minutes. Always make sure that the values are separated by periods, as shown in the example at left.
- Send 0 if no transport is needed
Note: Confirming transport will automatically send a notification text message to the receiving facility if your Administrator has set up a phone number for that facility in the Beacon web pages.
Note: For “Transfer/Delivery” Responder Types, the Transport Destination can include non-healthcare facility destinations, lik
6. Destination Arrival

- Send 1 to confirm when you have arrived at the destination facility
- Send 2 , if you need immediate assistance from Dispatchers, Supervisors or Responders (for example, if you need a backup vehicles)
- If your transport is delayed, sends 3 followed by the expected delay time (in minutes). This text is forwarded to the destination facility.
- Send 0 if you need to cancel your transport (rare, but possible)
7. Complete Incident

- Send 1 if you need to add another transport leg or need to return to the scene. This will revert you back to Message 5: “Confirm Transport”
- Send 0 when you have completed the incident and are ready to become available again
8. Response Times Summary

Once the Responder has completed the incident, they’ll receive a message providing their Response Times.
They’ll also be asked if they want to Submit Incident Notes. Continue reading below to learn more about Incident Notes for SMS.
Additional SMS Functions
Included here are additional codes that can be sent to Beacon to manage other interactive features via SMS.
View SMS Code Index

The SMS Code Index will show you all of the other possible SMS messages that can be sent to interact with Beacon and other responders.
Send ### to Beacon to request the SMS Code Index, as shown here.
Log In / Log Out

- To Log In: Send 123 to Beacon, then select which type of Transport you have
- To Log Out: Send 456 to Beacon
SMS Chat

It’s possible to send chat messages to Web Dispatchers via SMS. Simply include 411 at the beginning of your message, and it will be sent to Web Dispatchers. Chat messages coming from Web Dispatchers via SMS will start with [411] . (This is to help you distinguish between chat messages sent via mobile app and SMS.)
Read more about SMS Chat and Mobile Chat here.
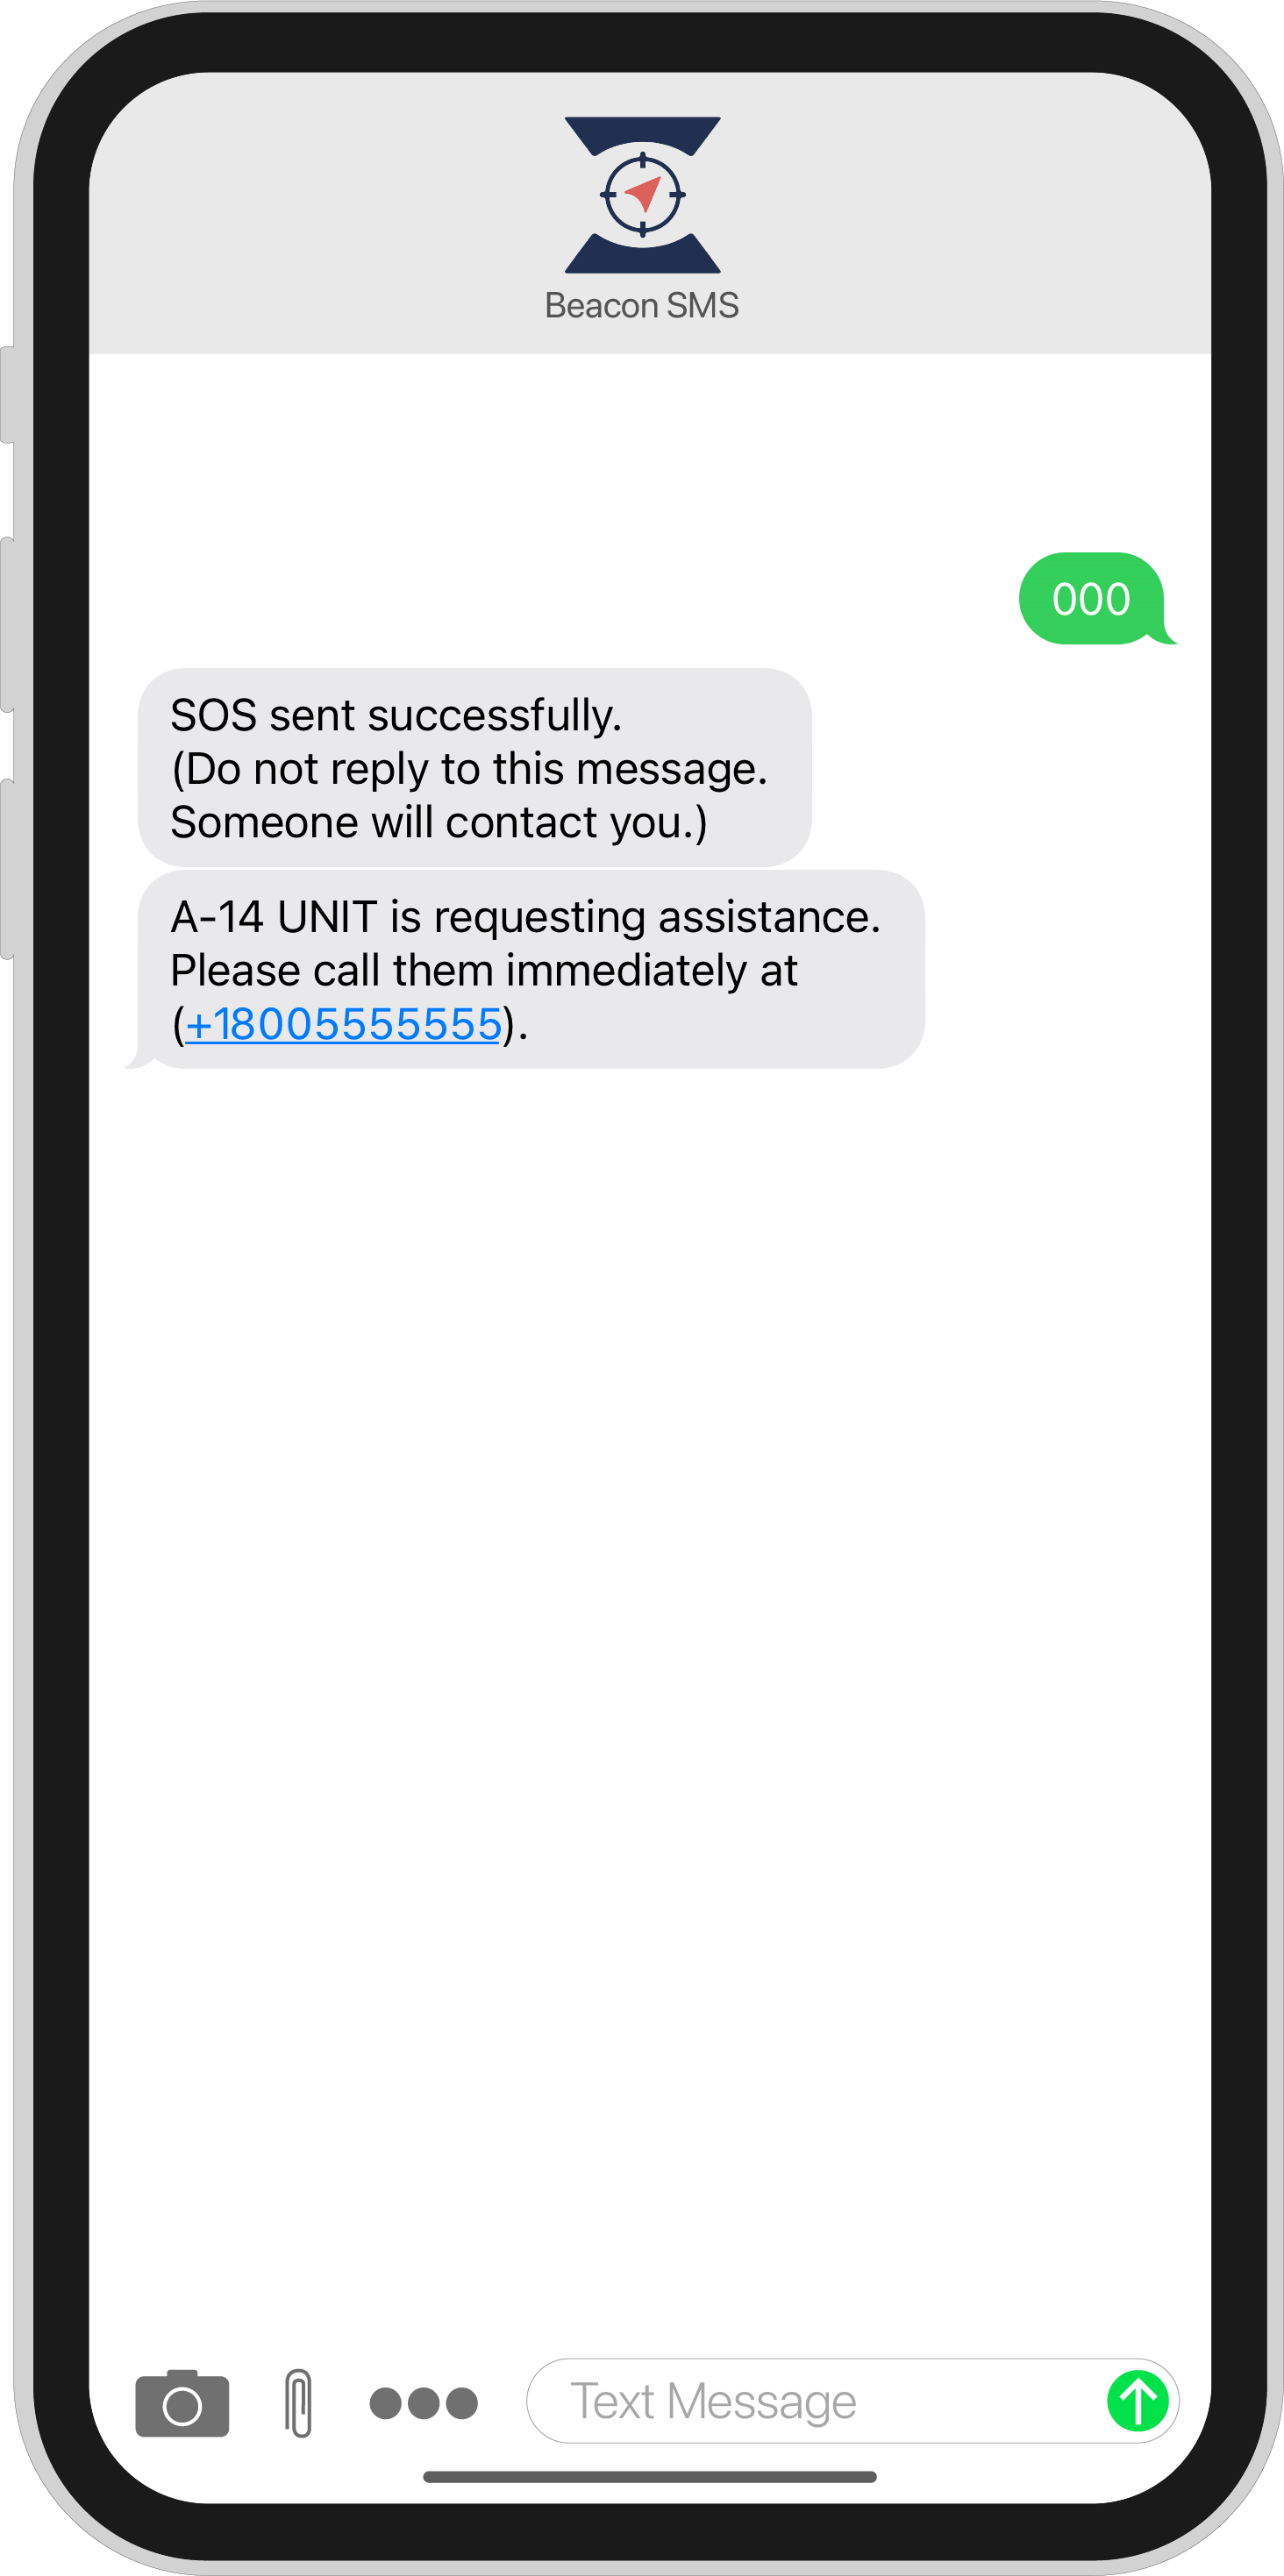
SOS / Distress Message

If you are in need of immediate assistance, send 000 to Beacon. Beacon will then notify all users who are registered on Supervisor List that you are requesting assistance and tell them to call you immediately (as shown at bottom).
Incident Notes

It’s possible to submit and save incident notes for any incident that you’ve been assigned to. Simply start your message with the Incident ID in parentheses — not the Incident Number — and then write your notes after. Once you’re finished, send the message with your notes to the Beacon number like you would with all other SMS messages sent to Beacon.
Read more about submitting Incident Notes via SMS or via the mobile app.