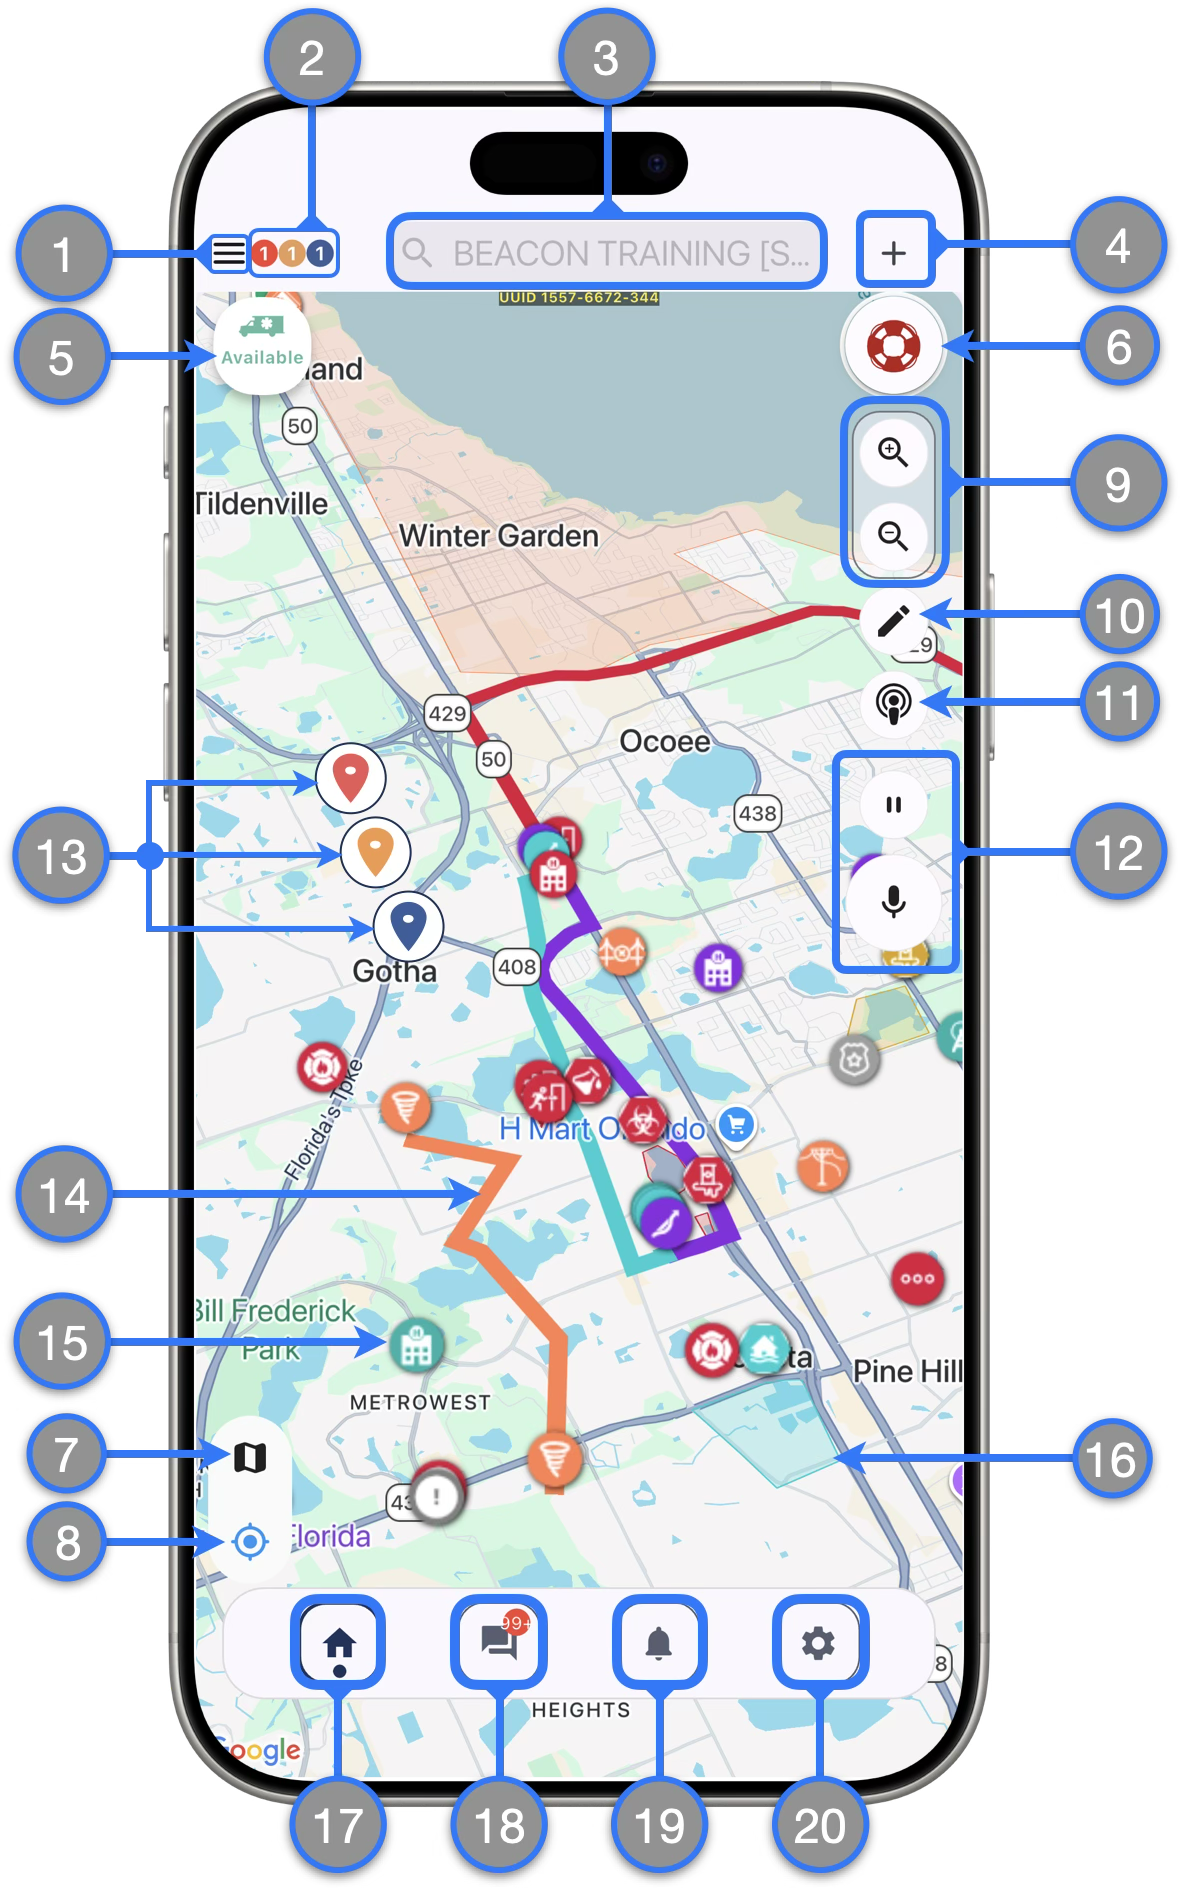
Home Screen Navigation
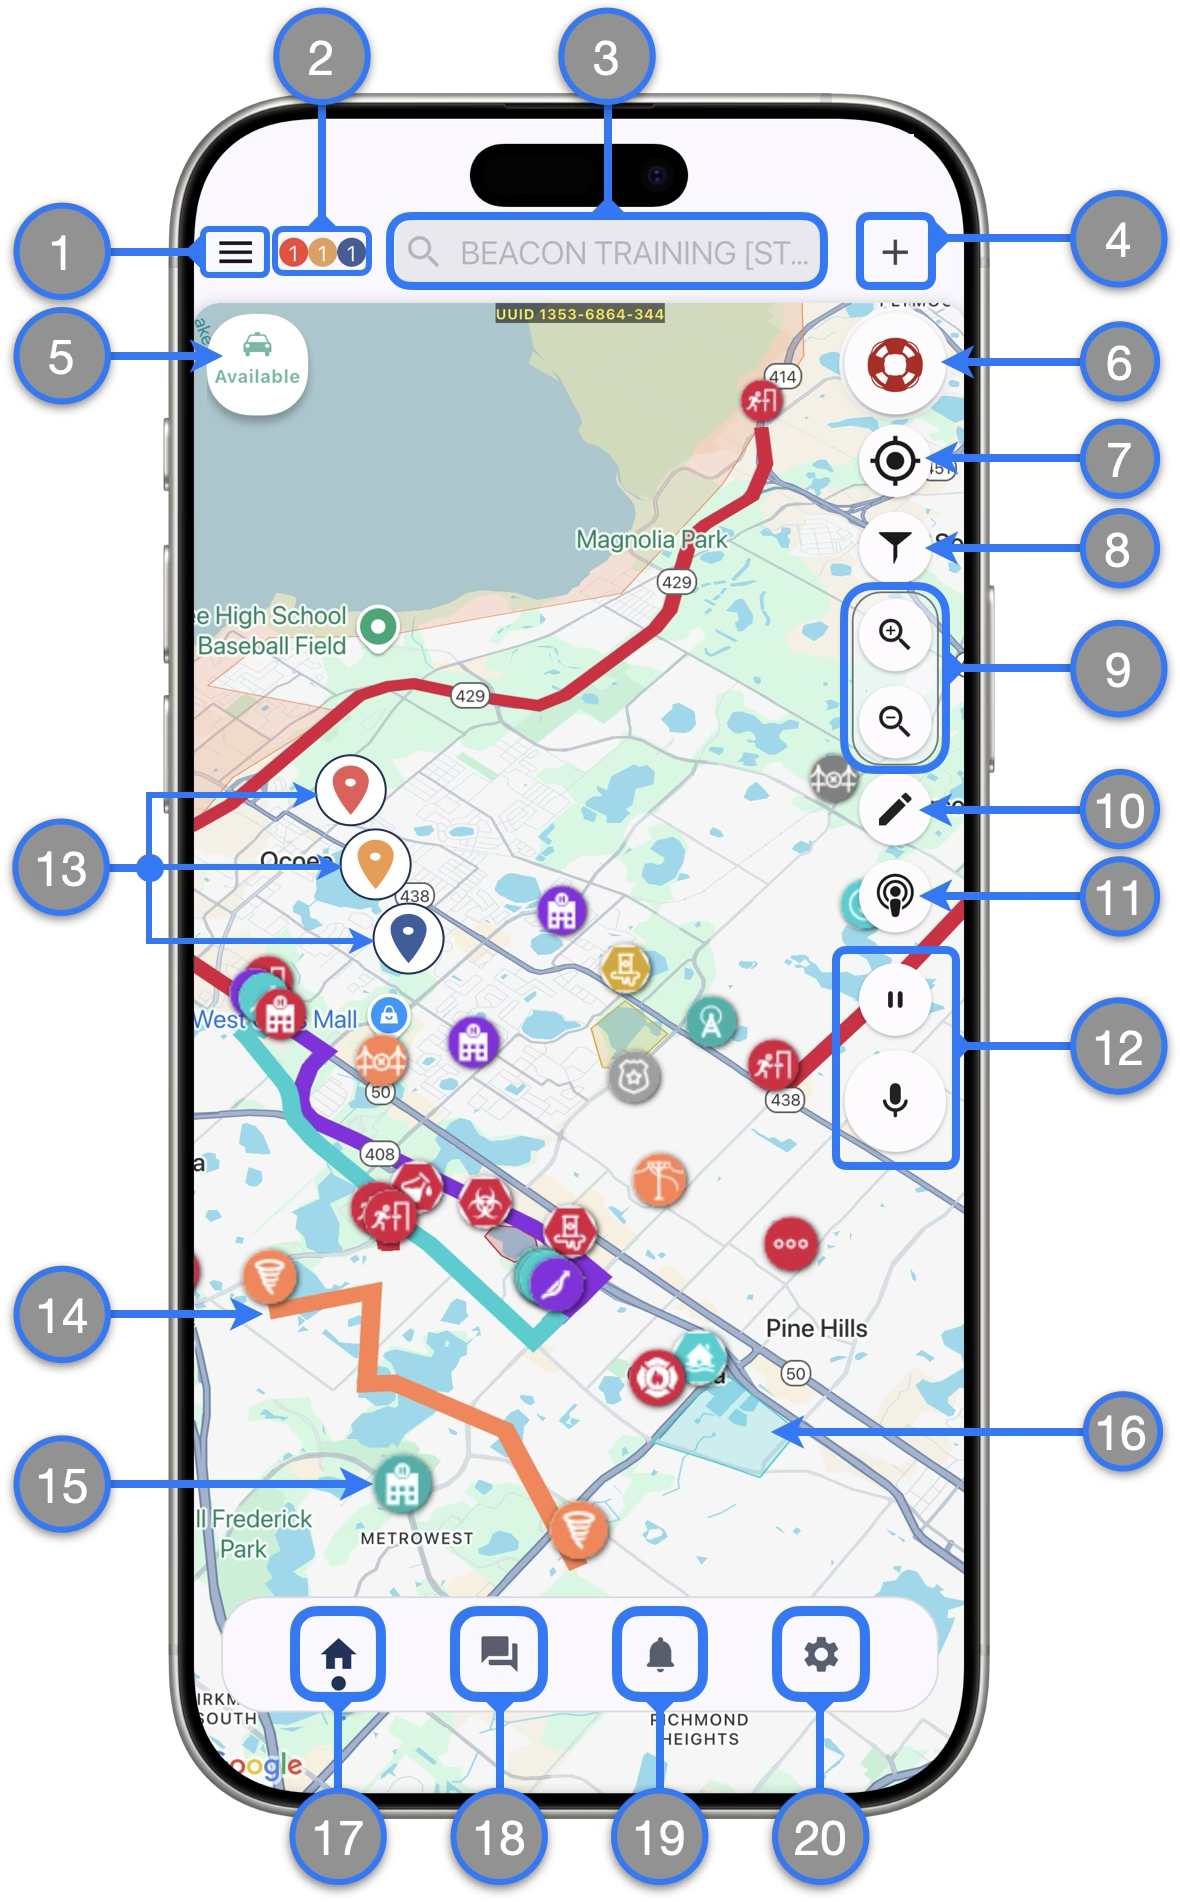
- Sidebar — Displays lists of Active Incidents, Assigned Responders and Available Responders
- Incident Badges — Displays a count of active incidents by Dispatch Mode
- Global Search bar — When not actively searching it will display your Agency Name. Tap to immediately see different lists like Responders, Map markers, incidents and more. Use this to also search addresses and places.
- Create Incident Feature
 — Brings you to the screen where you can create new incidents
 - Duty Status Icon — Displays your current Duty Status. You can tap on it to se options to change your status when not involved in an incident response
- SOS Button — When clicked, Dispatchers, Supervisors and Administrators will be advised that you personally need assistance immediately
- My Location — Press once to center the screen on your location; press and hold to keep the screen centered on your location as you move (the icon will turn blue)
- Map Filtering — Press to open the menu to change between map views and control the layers visible on the map
- Map Zoom buttons — You can hide them from the settings page Map Settings menu if desired
- Map Editing — Create and edit map markers in a similar way web dispatchers do
- Ping Responders — Press to locate responders on the map (only possible for responders who are using the mobile app and granted location permissions)
- Push-To-Talk — Send voice messages to the “All” chatroom from the dashboard. (Learn more)
- Active Incidents — These are shown as RED , YELLOW or BLUE map pin markers and indicate where active incidents are currently happening
- Paths — Can show macro paths (like hurricanes or tornadoes) or micro paths, like evacuation routes and detours
- Landmarks — Include hospitals and other transport destinations, hazards, and other points of interest
- Zones — Illustrate areas of interest, like flood zones, the boundaries of mass gatherings, etc.
- Home — Brings you to the Home Screen
- Chats — Press to view a list of active or past conversations chatrooms
- Notifications — View a list of the Beacon alert notifications you have received
- Settings — Takes you to the settings screen where you can manage your account and app preferences.
![]() — Identifies a feature that requires special permission. See all available Special Permissions and learn more here.
— Identifies a feature that requires special permission. See all available Special Permissions and learn more here.
For this iteration of the beta interface introduced on version 7.0.0, the map layers / filter menu along with the center on my location button have been moved to the lower left corner on the map.
Duty Status
Responders can change their Duty Status right from the Mobile App Home Screen
To switch On-Duty / Off-Duty:
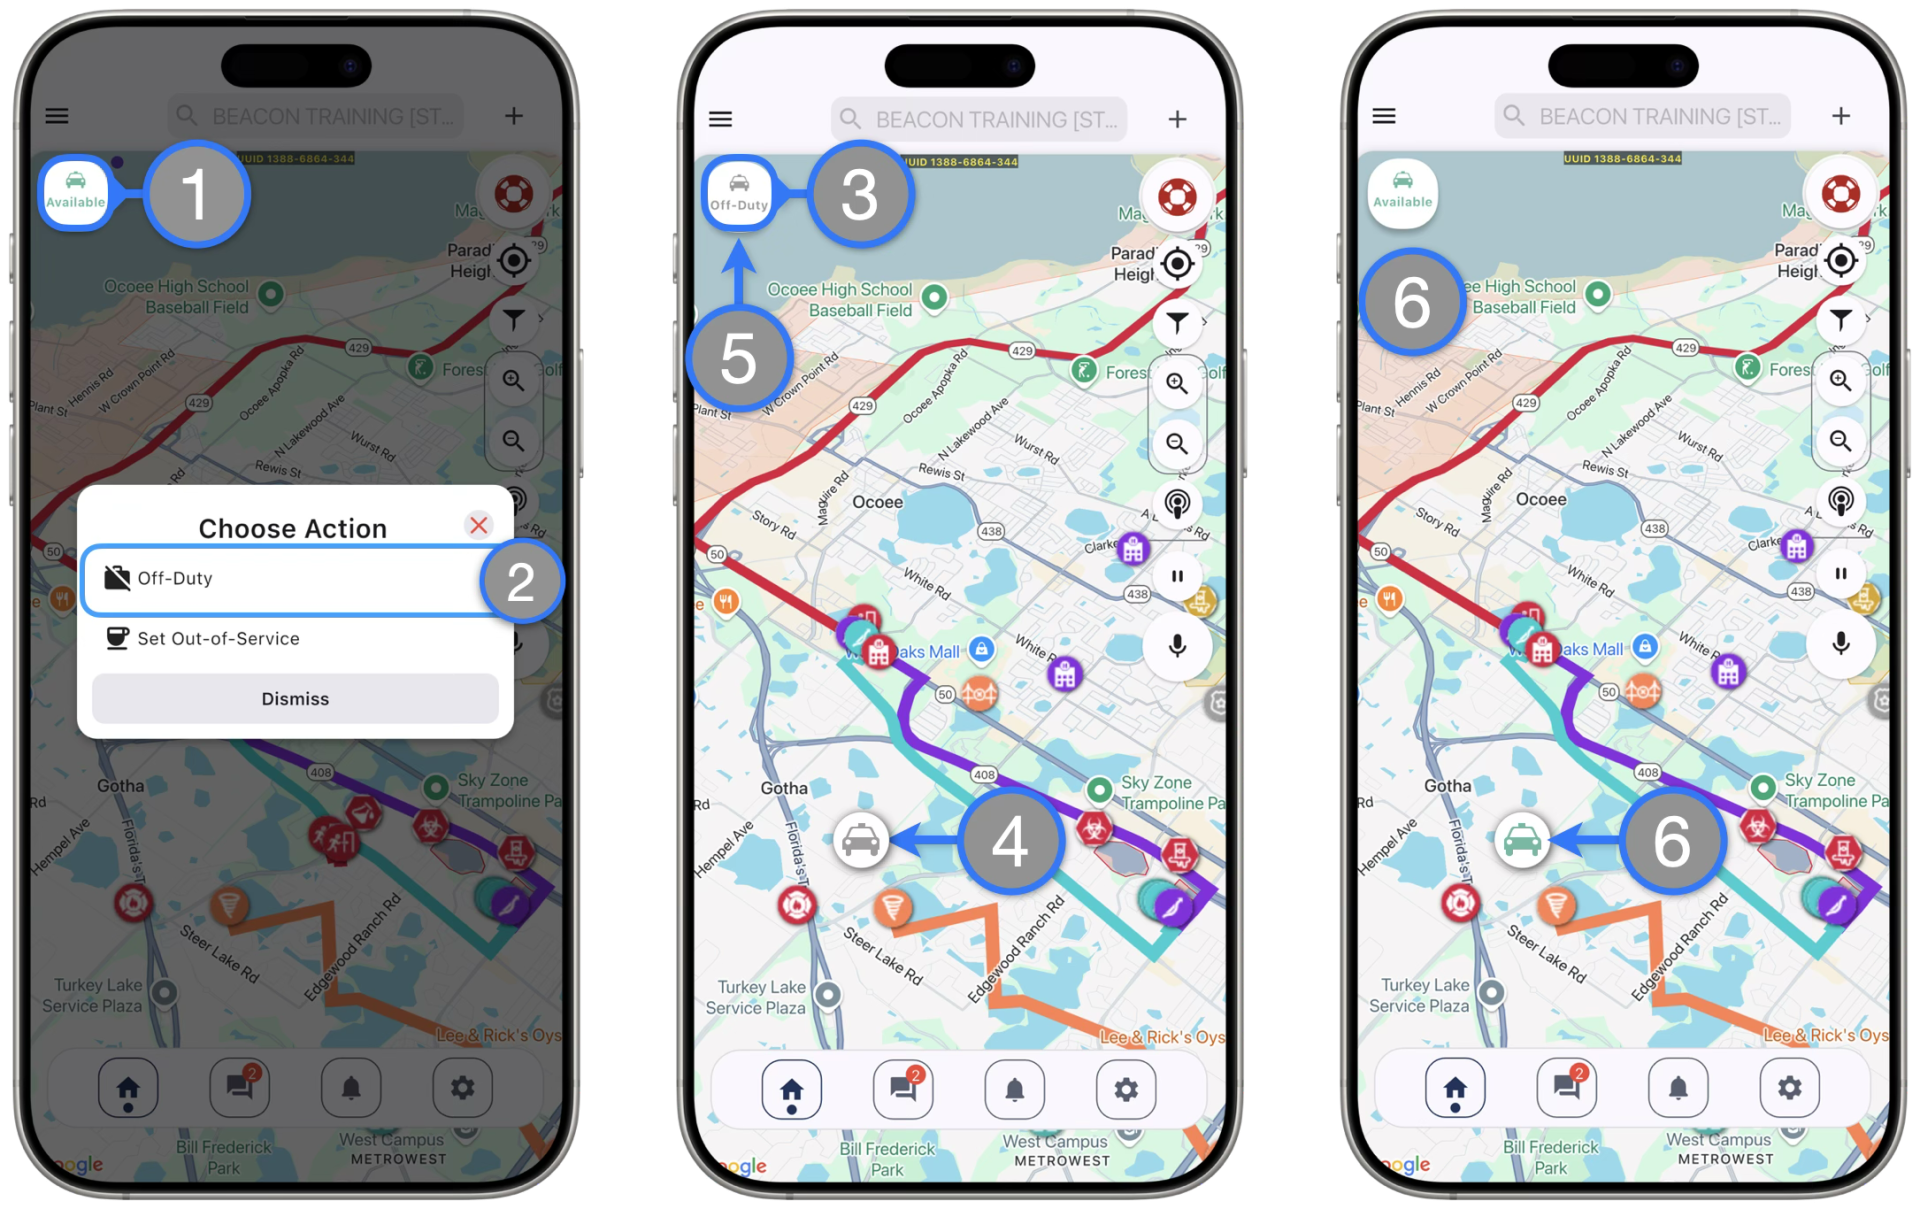
- While On-Duty and available, your status icon will be green. Tap on it to switch your responder status.
- On the emerging dialog, choose the Off-Duty option
- The Duty Status icon will update and display Off-Duty
- The responder map marker will also update in your map screen and other Beacon users (depending on their permissions) including dispatchers will be able to see it
- When Off-Duty , simply tap on the status icon to change back to On-Duty and the available state
- The status and responder icons will update for you and other Beacon users.
*Additional Notes: When switching to Off–Duty, responders will not be able to receive new incident alerts or other Beacon notifications.
Out-of-Service Indicator
Responders will be able to indicate when they are not immediately available to respond by changing their responder icon to Out of Service.
To use the Out of Service indicator on the mobile app:

- While On-Duty and available, locate and tap the Duty Status icon on the Beacon Home Screen
- On the emerging dialog, choose the Set Out-of-Service option
- The Duty Status icon will update and display Out of Service
- The responder map marker will also update in your map screen and other Beacon users (depending on their permissions) including dispatchers will be able to see it
- While Out-of-Service, tap the Duty Status icon and have options to Turn off Out-of-Service and change back to the available state or to go Off-Duty
*Additional Notes
- A responder can only go Out of Service while available
- When Out of Service, responders will still receive incoming alerts and can be assigned to incidents
- Going from Out of Service to Off-Duty will override the visual indicator and update the responder status to Off-Duty