A new way to handle incidents waiting to be dispatched while more information is gathered
(m) Only Managers can activate / deactivate Pending incidents.
To activate Pending Incidents for your Beacon Agency Account (data center):
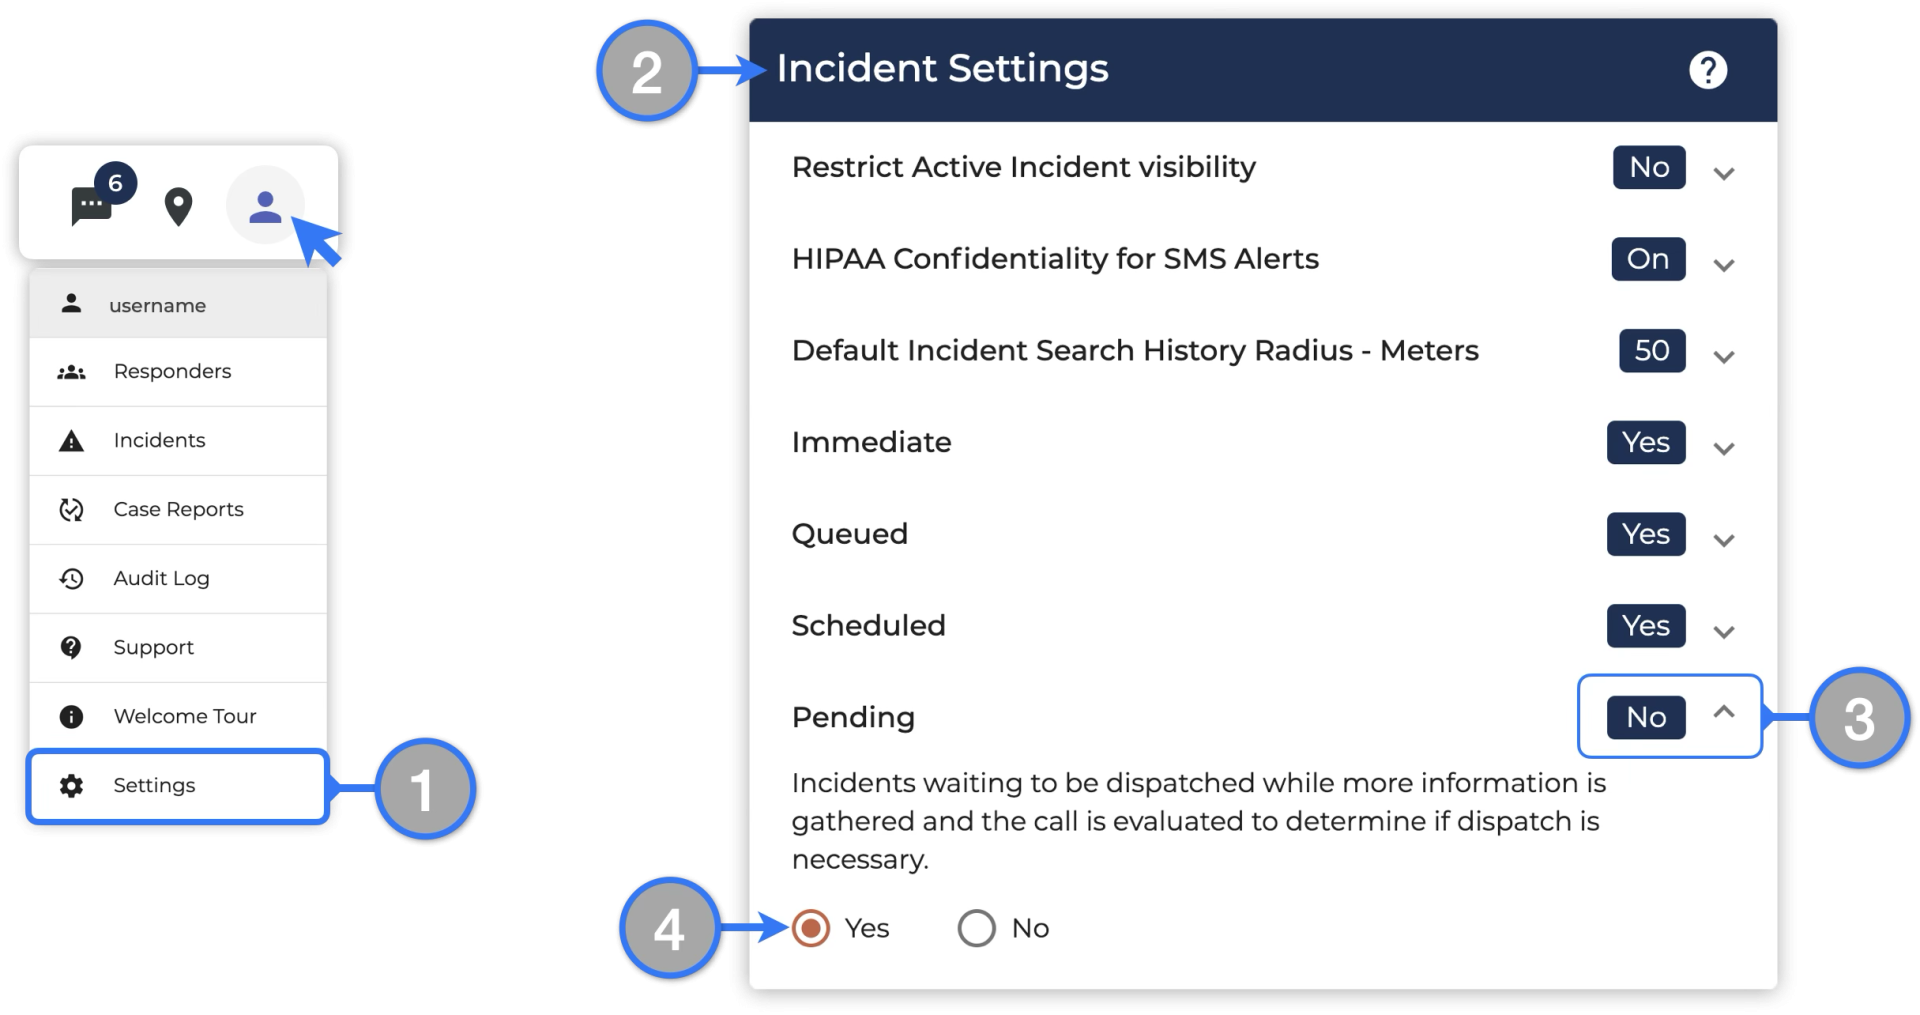
- Go to the Settings page
- Locate the Incidents menu
- Expand the Pending section
- Select Yes and Pending incidents will be enabled
Introduction to Pending Incidents
Once Pending incidents have been enabled by a Web Manager, Dispatchers can head into the dashboard and find a new Pending Incidents panel (A) and also see them in the Dispatch Mode options when creating incident alerts (B) which allows them to save draft Incidents.

Creating Pending Incidents
Dispatchers can create Pending incidents while more information is gathered to determine if a dispatch is needed and which alert needs to be generated.
To create a pending incident:
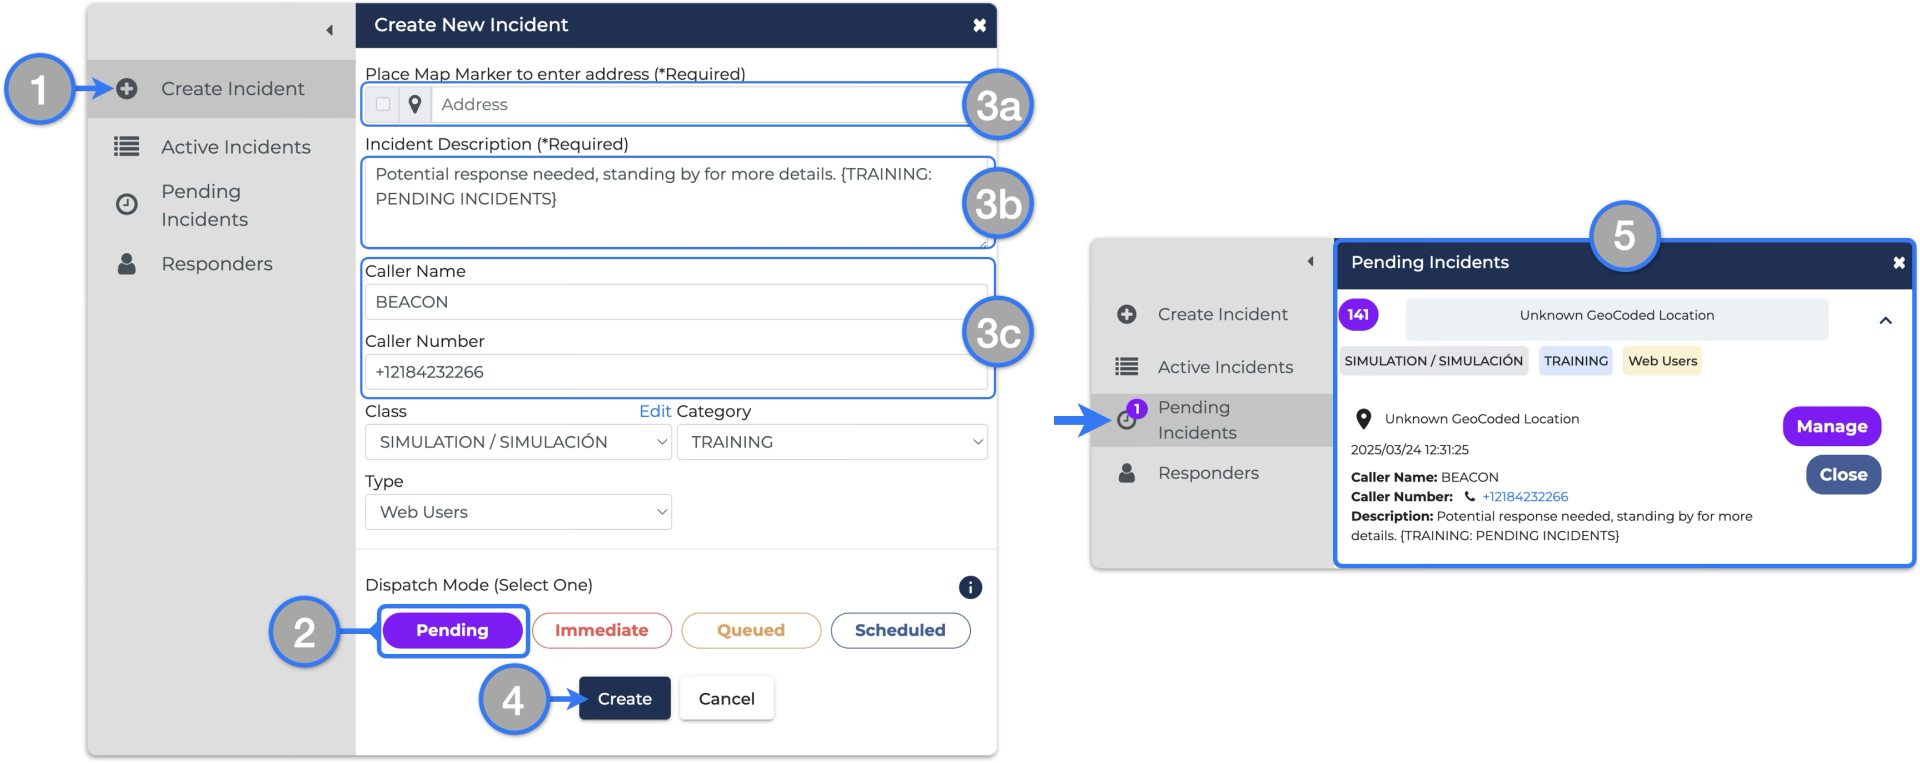
- Open the Create New Incident panel
- If not selected automatically, select Pending from the Dispatch Mode options
- Enter any information available, only one of the mentioned below would be needed to create a Pending incident, that could be either:
- Address (Location)
- Description
- Caller information
- Check all information and click Create when ready
- The pending incident will be created and will be assigned a unique Number ID Find it on the Pending Incidents tab
Managing Pending Incidents
Dispatchers can update Pending incidents when more information is available without generating an incident alert.
To update a pending incident:
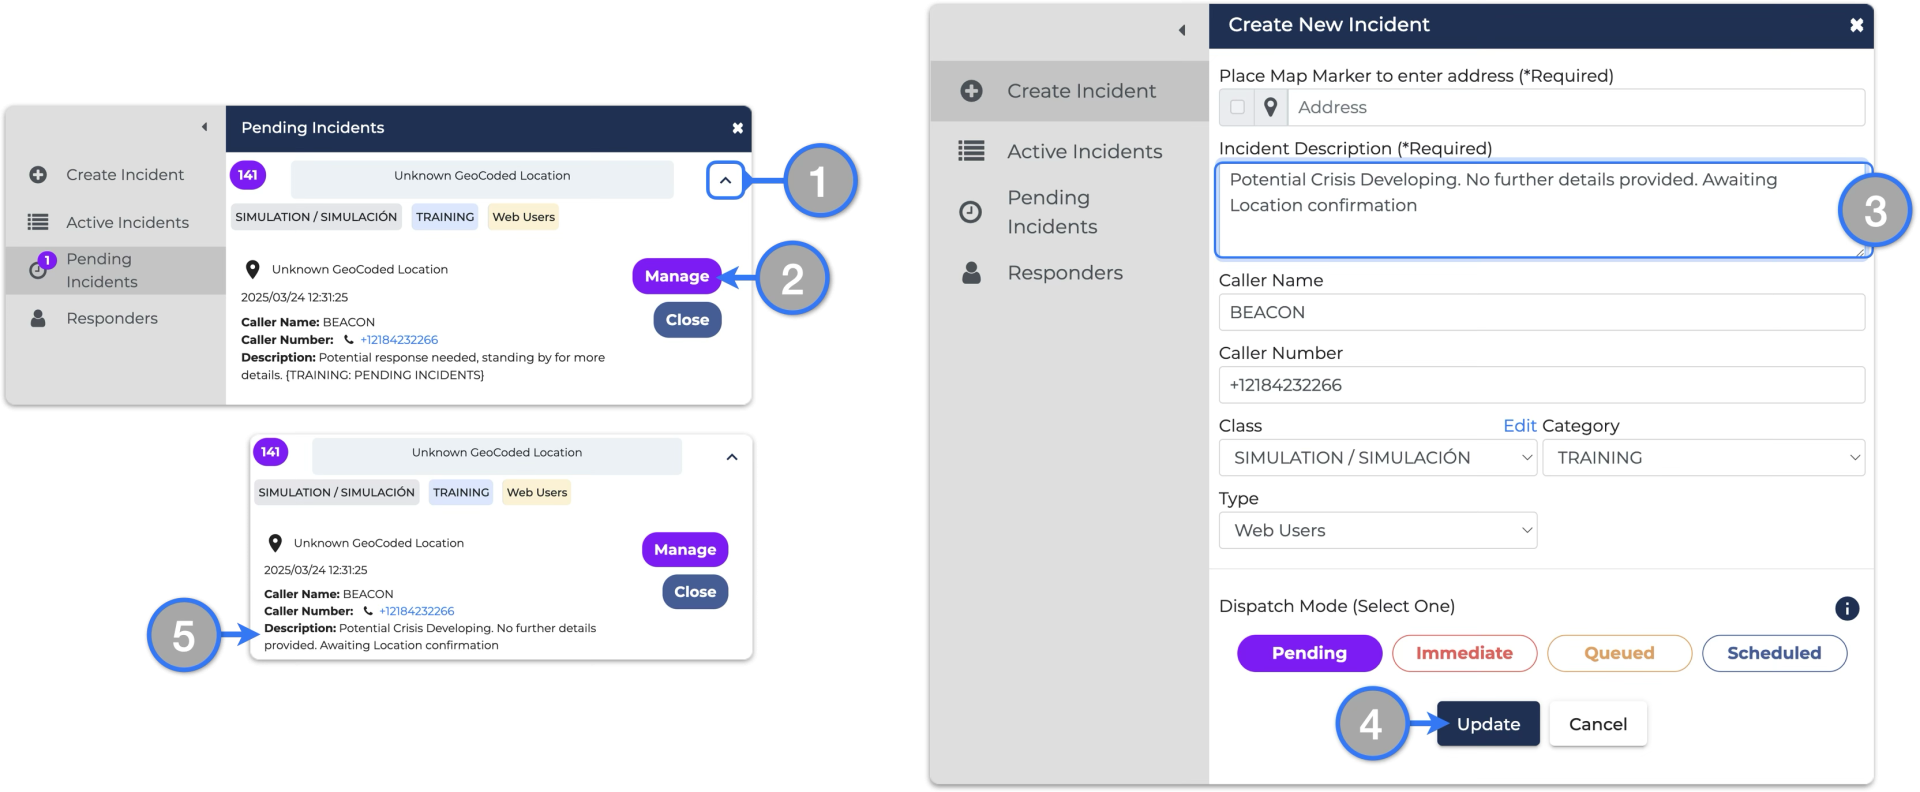
- On the Pending Incidents tab, locate and expand the incident you would want to update
- Click the Manage button; the New Incident panel will open and populate automatically
- Make the necessary updates (image shows the description being updated)
- Check all information and click Update when ready
- Any updates made will be visible on the pending incident card
Dispatchers can manage Pending incidents and generate an incident alert when the determination to dispatch is made.
To dispatch a pending incident:

- On the Pending Incidents tab, locate and expand the incident you would want to update
- Click the Manage button; the New Incident panel will open and populate automatically
- In order to generate the incident alert from this point you will need to make sure minimum dispatch requirement are met:
- An Incident Address (Location) should be selected by placing an incident marker on the map
- The Incident Description is also required – leaving it blank will not allow the alert to be generated
- Select the desired Dispatch Mode – ( i.e. Immediate | Queued | Scheduled )
- Once a dispatch mode is selected, the other fields to complete the dispatch will be displayed
- Make any updates and check all the information. Click Create when ready to generate the incident alert