Settings Page is only available for Managers
Navigate to the Settings Page by clicking on the Settings option in the Profile Menu
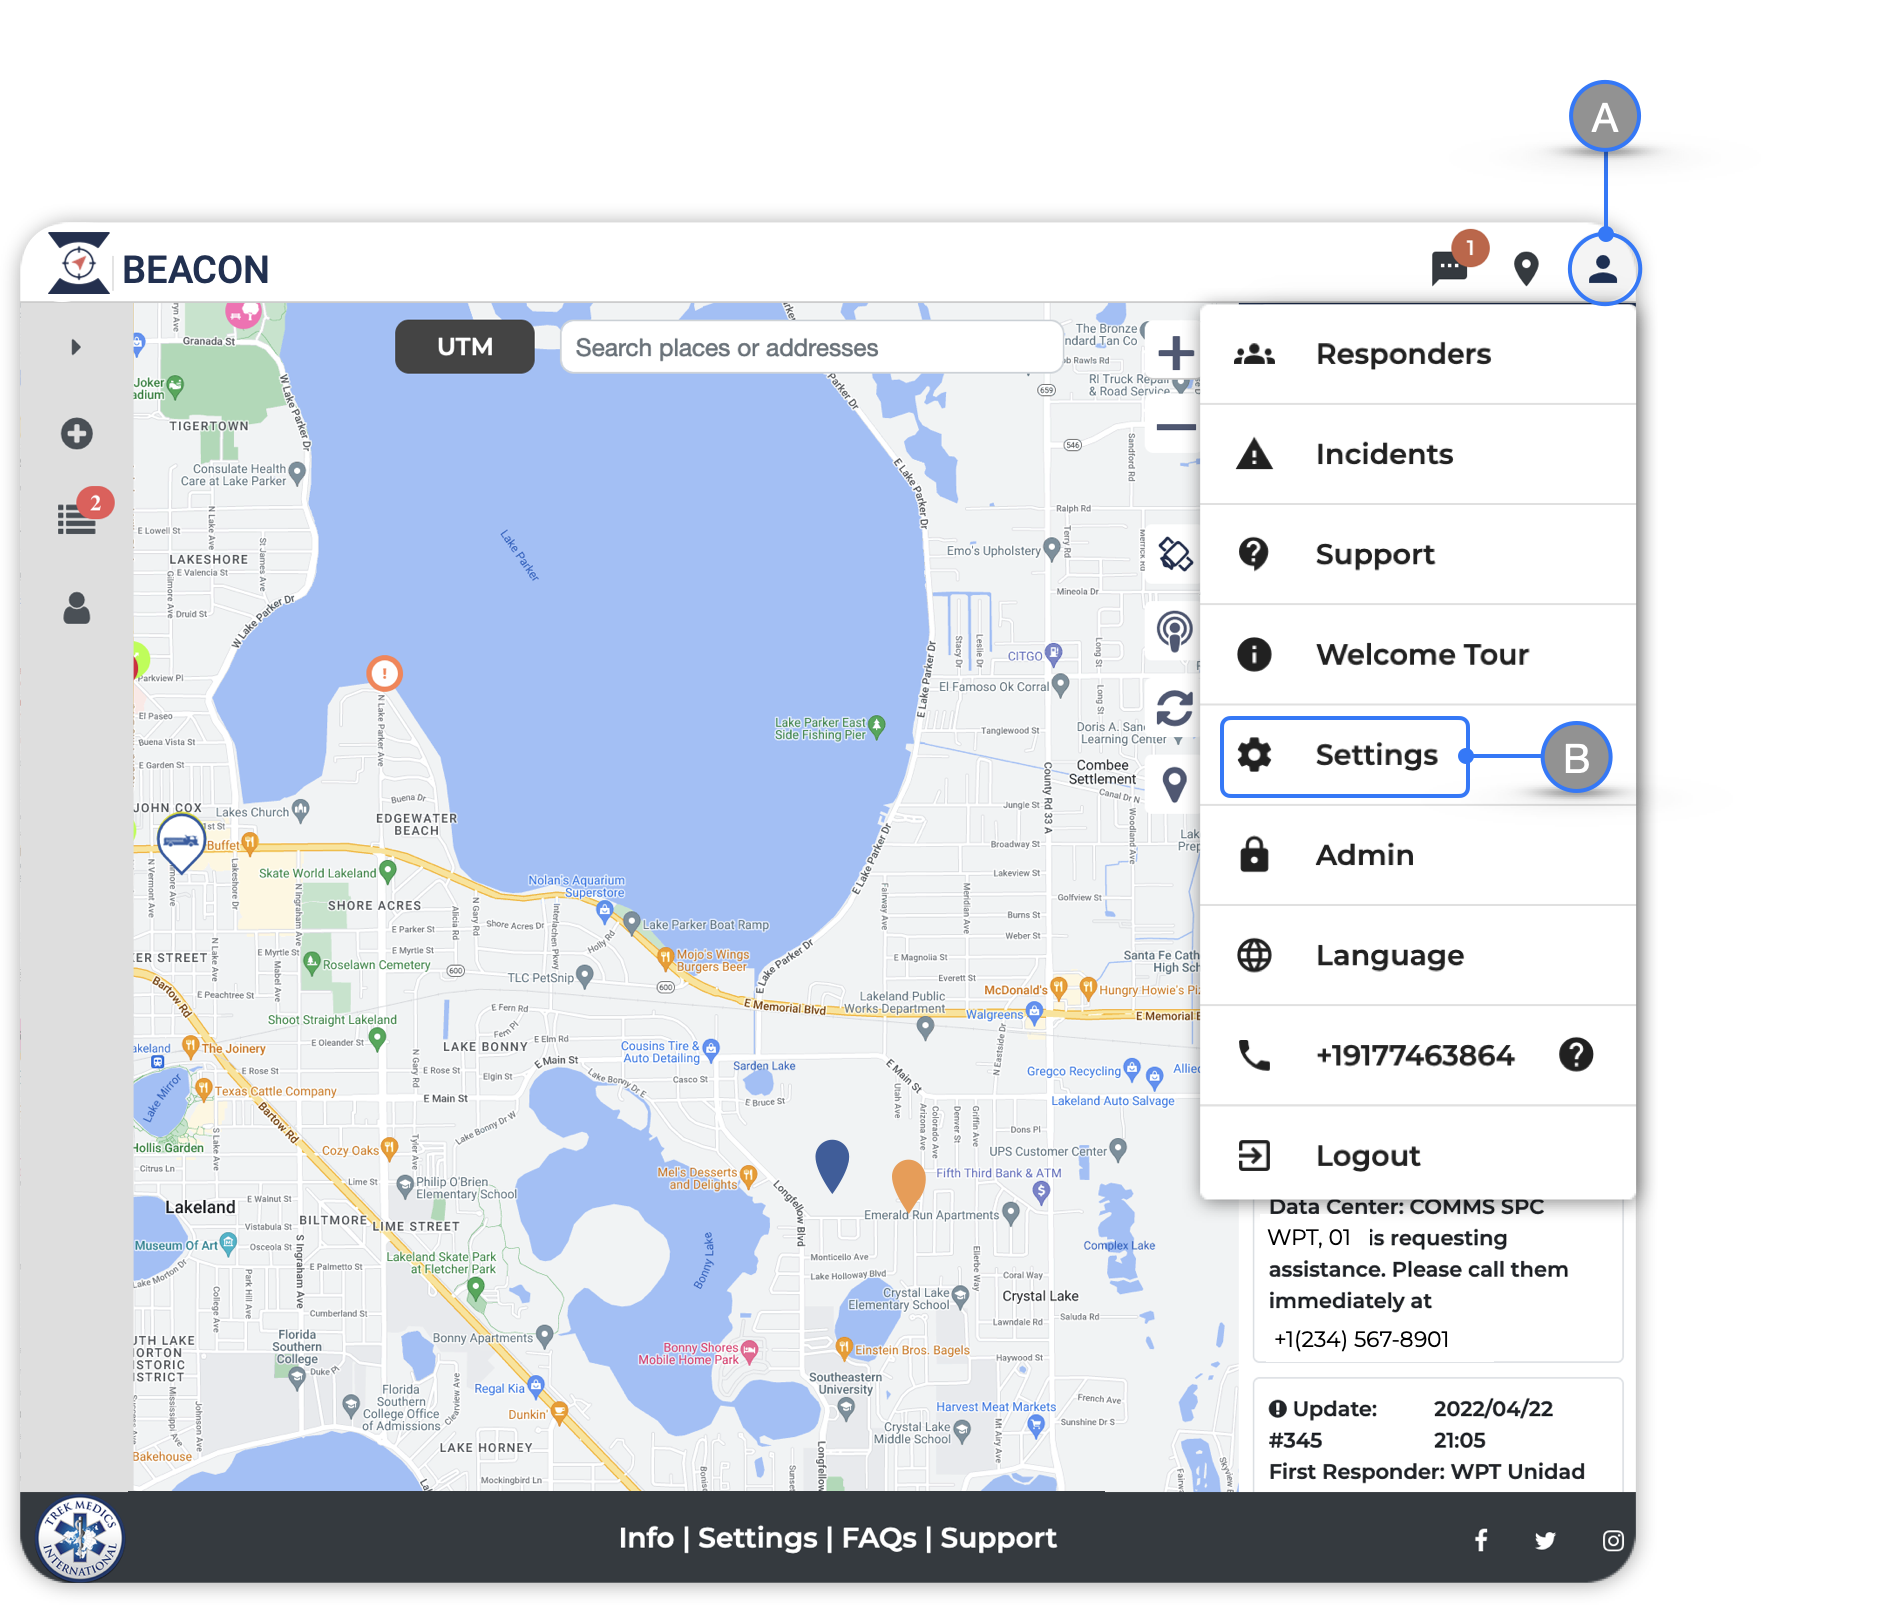
The Settings page is separated into different sections (click on each section to skip to the explanation below):

Dashboard Settings

- Admin Language — Set the language for administrative pages and reports
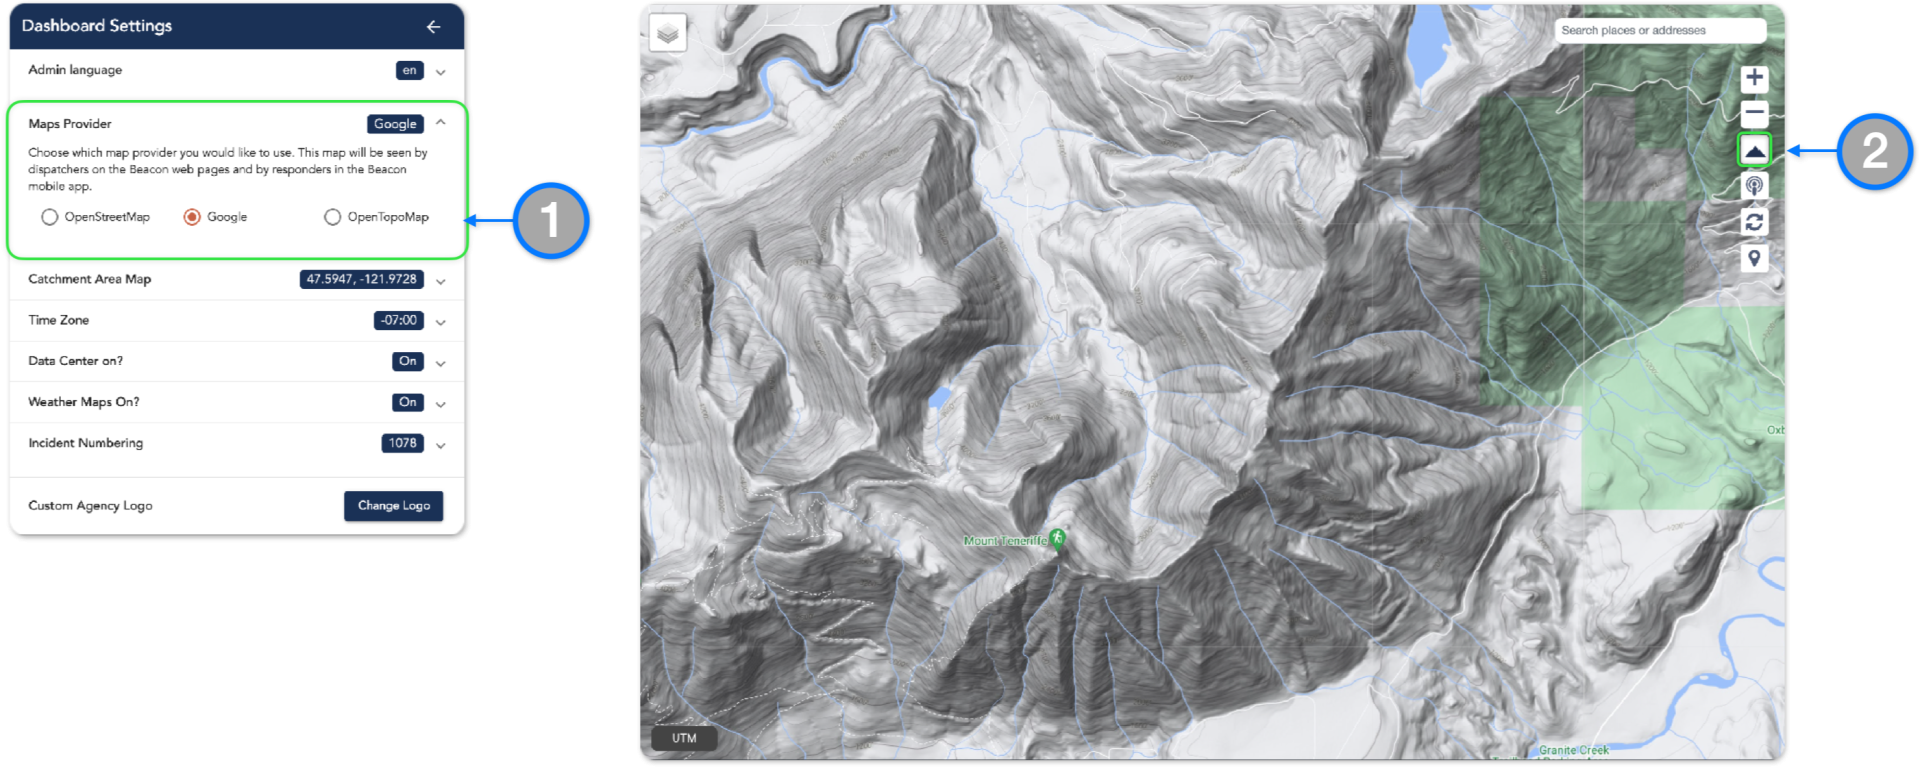
- Maps Provider — Select between Google Maps, OpenStreetMap (OSM) or OpenTopo Maps
- Only Google Maps offers three (3) different views: Road Map, Satellite view and Topographical Map
- Catchment Area Latitude/Longitude — This setting is used to set the default map view for both the Web pages and the Beacon mobile app. (If the map already has your position set, this was likely done when you first created your account.) To set/update the default map view:
- Click the Drop Down next to the Latitude / Longitude coordinates to set the position of your map.
- Point and click to place the marker where you would like to center the map
- Click Save
- Time Zone — Use this drop-down to set the correct time zone for your service. Your time is based on UTC / GMT time zone. (Link to Time Zone calculator)
- Weather Maps On? — Select if you would like to activate Open Weather Map layer overlays options. This setting only pertains to the web app interface.
- Incident Numbering — Enter the number you would like your Incidents to start with. By default, Incidents will start numbering with “1”
- Custom Agency Logo — Click here to upload a custom logo. Agency logo conforming to the listed specifications can be uploaded to your account and will be displayed on the top left of the dispatcher dashboard in place of the default Beacon logo.
OpenTopoMap and Google Terrain map options available under Maps Provider
OpenTopoMap is available as a third Maps Provider option on the Settings Menu page under Dashboard Settings.
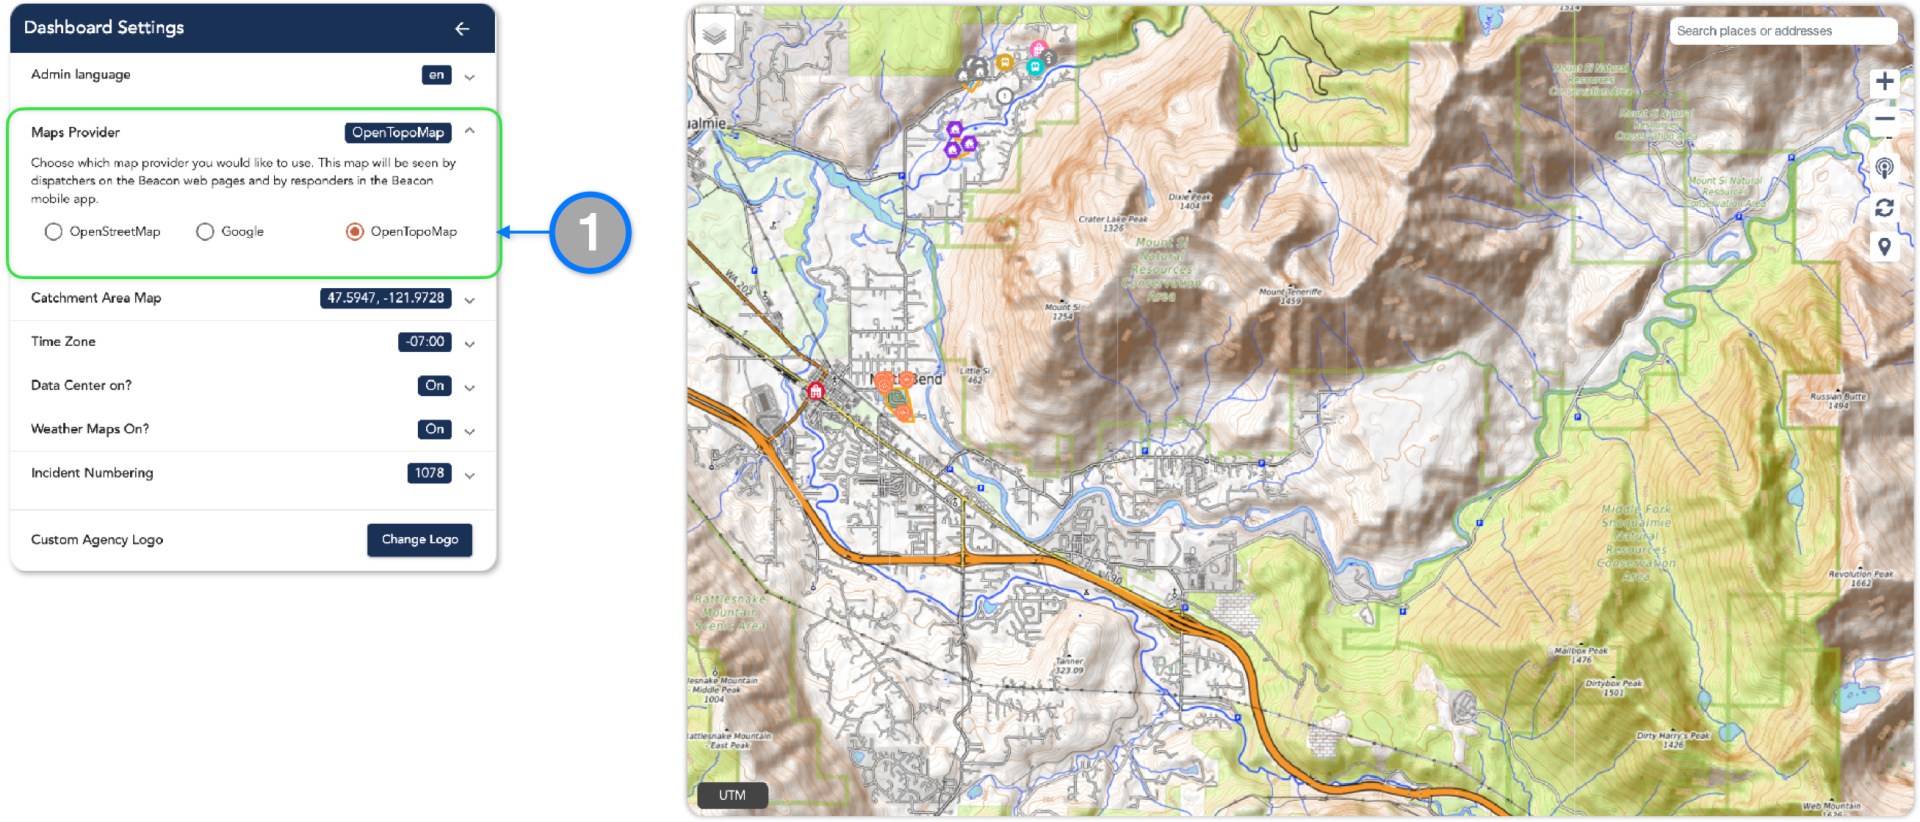
For Google Terrain, the Maps Provider should be set to Google on the Settings Menu page under Dashboard Settings.
Switching between Google Maps, Satellite View and Terrain is done using the dashboard button.
Broadcast Alerts
Broadcast Alerts allow you to “crowdsource” Responders – similar to how Uber and Lyft crowdsource taxi drivers. Broadcast Alerts help response networks with large pools of Responders to improve response times, resource allocation, and response coverage.
Included here is a brief description of how they work — but please keep in mind that these settings can be used in a variety of different combinations, so we urge you to read a more in-depth discussion of the different Broadcast Alert settings here.

- Maximum Number of Responders per Incident — Sets the limit on how many Responders can respond to each incident alert. This is will be the default setting and can be changed when creating a new incident
- Preferred ETA — Determines which Responders are preferred for an incident based on their ETA. When set at 10 minutes, Responders with an ETA of 10 minutes or less will be assigned to the incident; Responders with an ETA greater than 10 minutes will be told to standby.Check out these scenarios and diagrams to see more examples of how the Preferred ETA works
- Confirmation Window 1* — The least amount of time (in minutes) you are willing to wait for Responders to reply to a Broadcast Alert from Beacon
- Confirmation Window 2* — The most amount of time (in minutes) you are willing to wait for Responders to reply to a Broadcast Alert from Beacon
- Default Alert Type — Set the default setting for “Alert Type” on the Create Incident panel
* For urban environments, the standard preferred ETA is 10 minutes or less. For rural environments, the standard preferred ETA is likely 20 minutes or more, depending on how many responders there are and how big your catchment area is.
FAQ: Why does the incident stay open after I complete it?
Incidents can be closed in three ways:
- All Assigned Responders complete the incident
- The Dispatcher cancels the incident manually
- Confirmation Window 2 closes and no other Responders are assigned*
If you’re using Beacon to run simulations, it’s very likely you’re going to move through the incident very quickly — faster than in real life. This will result in you completing the incident before the Confirmation Windows close, so the incident will stay open until the Confirmation Windows close. Also note that some Dispatch Modes will make the incident stay active regardless of responder completion.
Click here to learn more about the importance of Confirmation Windows.
Responder Tag Settings
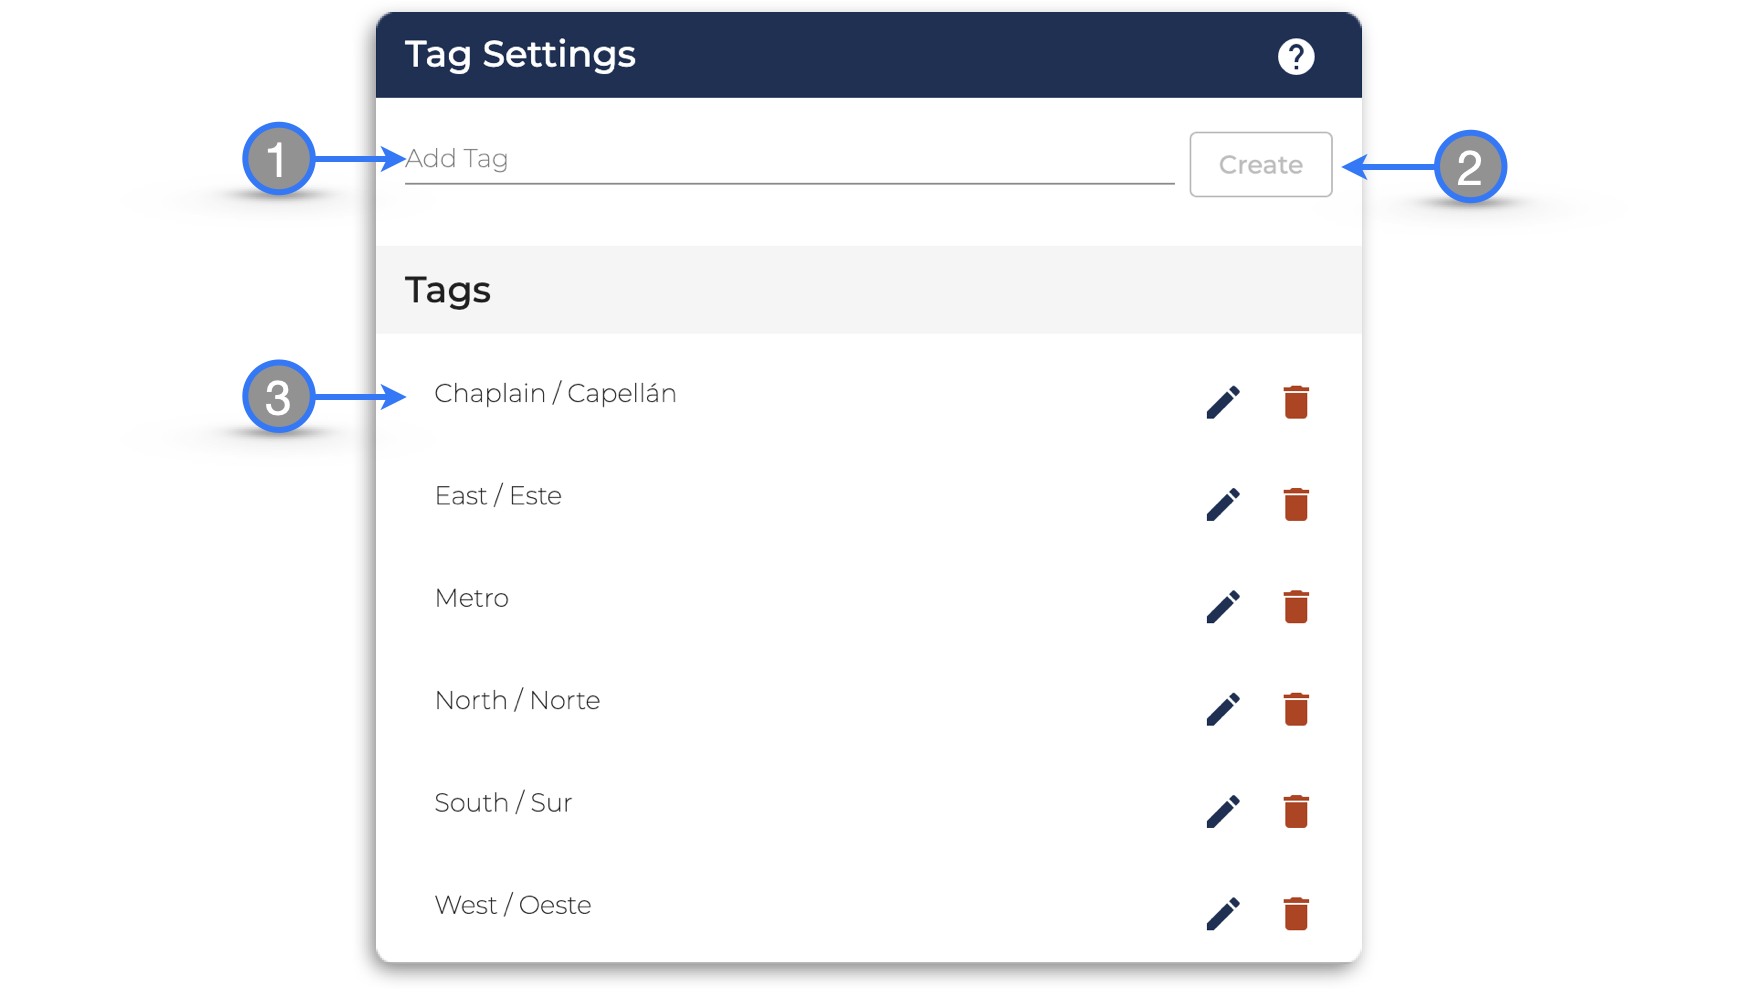
This is where you can create and save the different Tags your agency uses to organize responders — for example, according to neighborhood, zone, skill, seniority, role, equipment etc.
Click here to learn more about how to use Responder Tags.
Message Settings

- Beacon Gateway Number* — The phone number that Beacon uses to send and receive SMS messages to/from Responders in this Data Center. Responders who are using the SMS interface must communicate with Beacon using this number. All Responders should save this number as a contact in their mobile phone and assign a unique ringtone and vibration to it so that they can distinguish SMS messages coming from Beacon
- Note: This is not a public access number — like 911, 112, 999 etc. This number is for Responders only, not to be shared with the public or published on the internet
- Outgoing Message Server* — Displays which SMS Gateway is being used to send messages to Responders (Twilio, Nexmo, Beem Africa, etc.).
- Supervisor Notices — This link takes you to a screen that allows you to add people who will receive Initial Alerts for each incident created via SMS, but are not Responders. Unlike Responders, the same phone number can be added to the Supervisor Notices List in as many different Data Centers as you have access to
- Responder SOS emergency telephone number — When Responders trigger an SOS request the Emergency Number will automatically be dialed through the mobile app (see next section for more information)
*Indicates settings that can only be changed by Trek Medics staff.
Setting the Responder Emergency Number
The Responder Emergency Number is set up by Web Managers through the Web App settings. When Responders trigger an SOS request the Emergency Number will automatically be called through the mobile app.
To set up the Emergency Number, on the web interface:

- Access the Settings page (not shown on image)
- Locate the Message Settings menu
- Expand the Responder SOS emergency option
- Type the desired emergency number
- Confirm the number is correct and Save to complete
Incident Settings

- Restrict Active Incident Visibility — If set to “Yes”, Responders will only be able to see Active Incidents in the mobile app when they are assigned to that Incident except when dispatch broadcasted an incident. If set to “No”, Responders will be able to see all Active Incidents in the mobile app, whether or not they’ve been assigned to them
- Default Incident History Radius — Managers can set the radius Beacon will use to search and match previous incident locations when dispatchers are creating new incidents. Read more under the Creating Incidents section by clicking here.
- Dispatch Modes — Beacon offers Dispatch Mode options to help meet the need of different response operations by allowing dispatchers to create Immediate, Queued and Scheduled incidents. The settings and behavior of each are explained here.
- Custom Incident Labels — Allows managers to customize the Incident Class, Category and Type labels that appear on the Create Incident page – e.g, “Emergency – Trauma: Motor Vehicle Collision”.
- Custom Disposition Codes — Managers can add and edit the disposition codes here so they ara available to use on incidents
Resource Lists
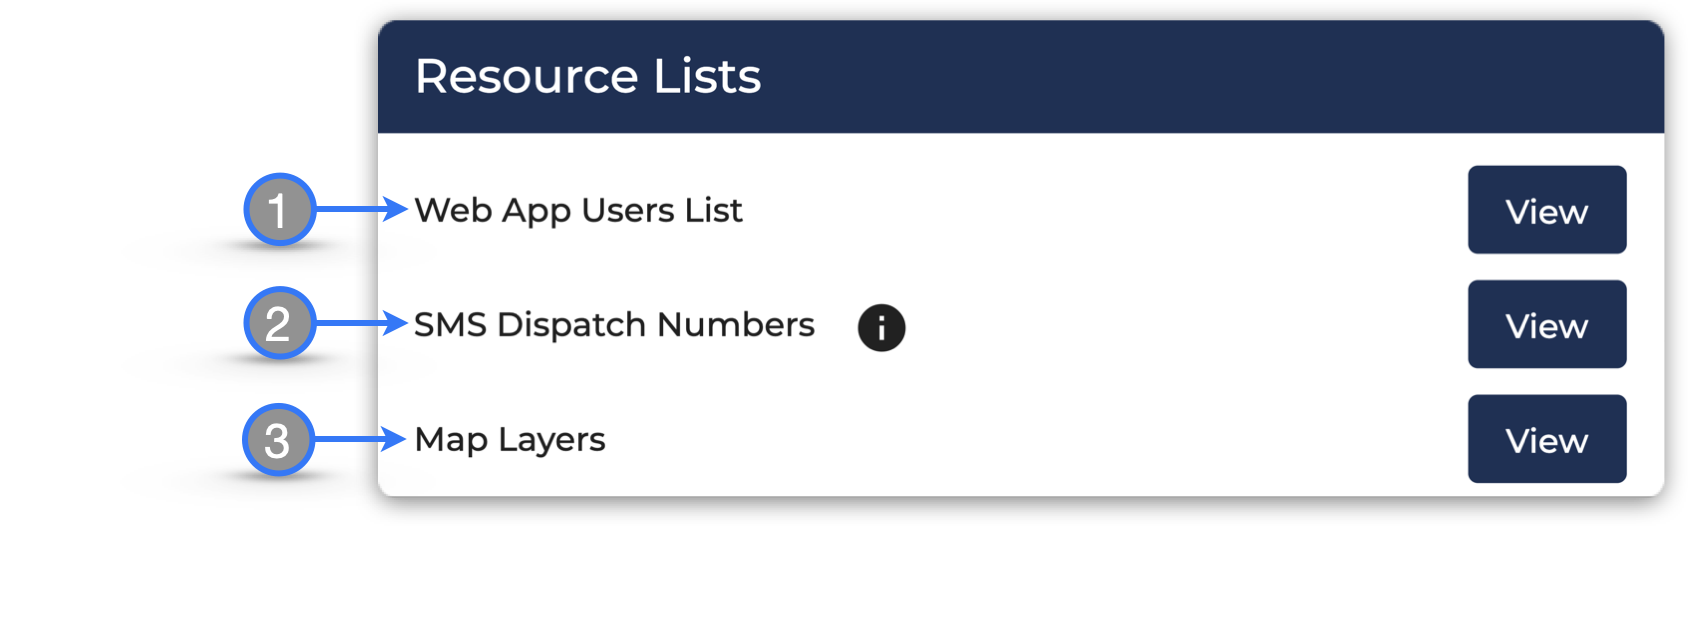
- Web App user List — Users of the Web application with Manager permission can manage other users — dispatchers and managers who are connected to the agency account.
- SMS Dispatcher List — Add and manage phone numbers enabled for creating new incidents via SMS. (See pages: Add SMS Dispatchers and Create Incidents by SMS)
- Map Layers — will take you to a new page where you can add/edit map layers. Read more about Map Layers here.
Reports
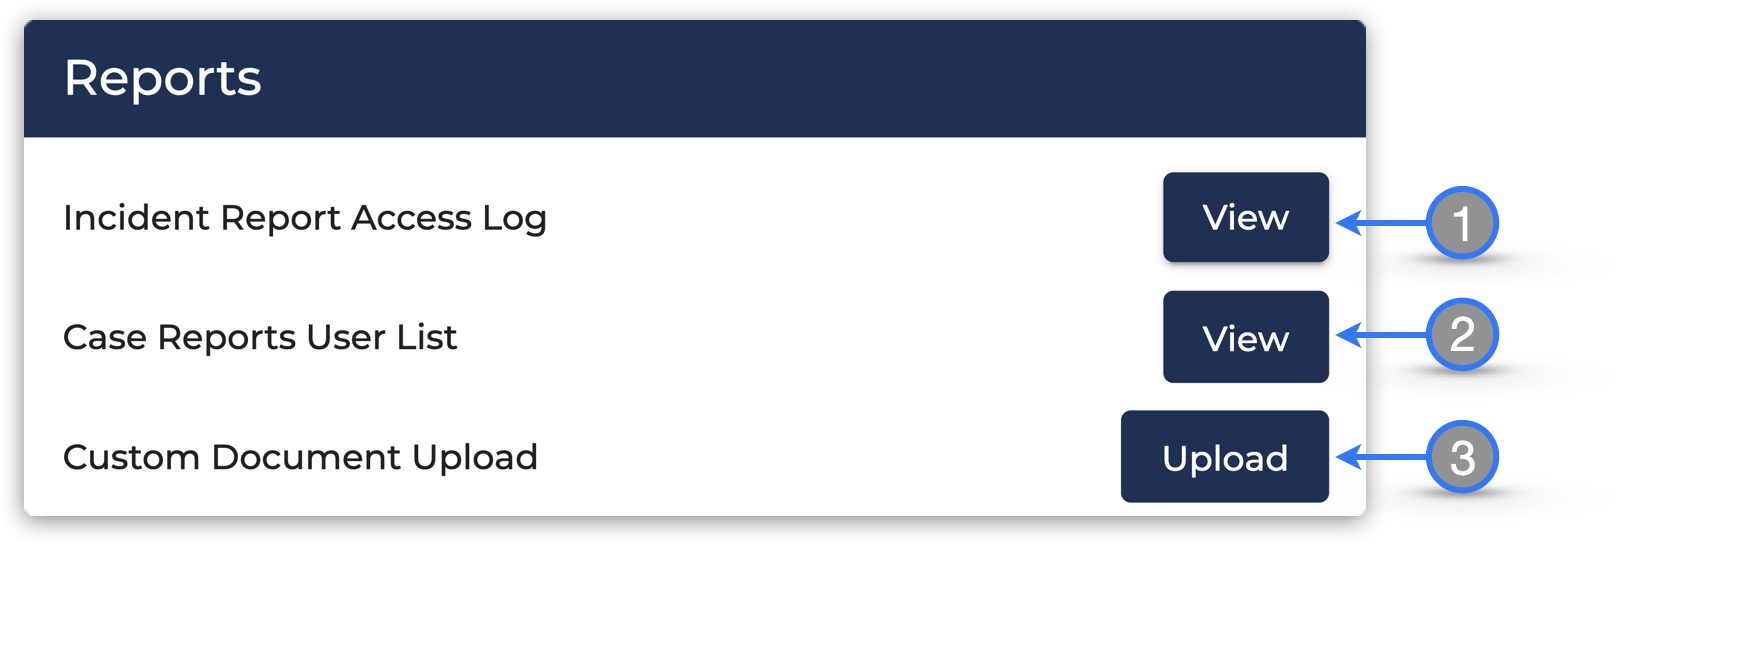
- Incident Report Access Log — Click view to see a table that will show username and date for each accessed the Incident Report
- Case Reports User List — Click view to add Responders who will be creating Case Reports through the mobile app, otherwise they will not be able to access the feature on their devices
- Custom Document Upload — Click Upload to add Custom Documents that will be available for Responders to use in the Documents section of the Case Reports