Users can now manage different map providers, map views and filter layers right from the Home Screen.
- To change map view, press the Map Filtering icon on the Home Screen.
- Select the Map provider you would want to use.
- Select your preferred map view.
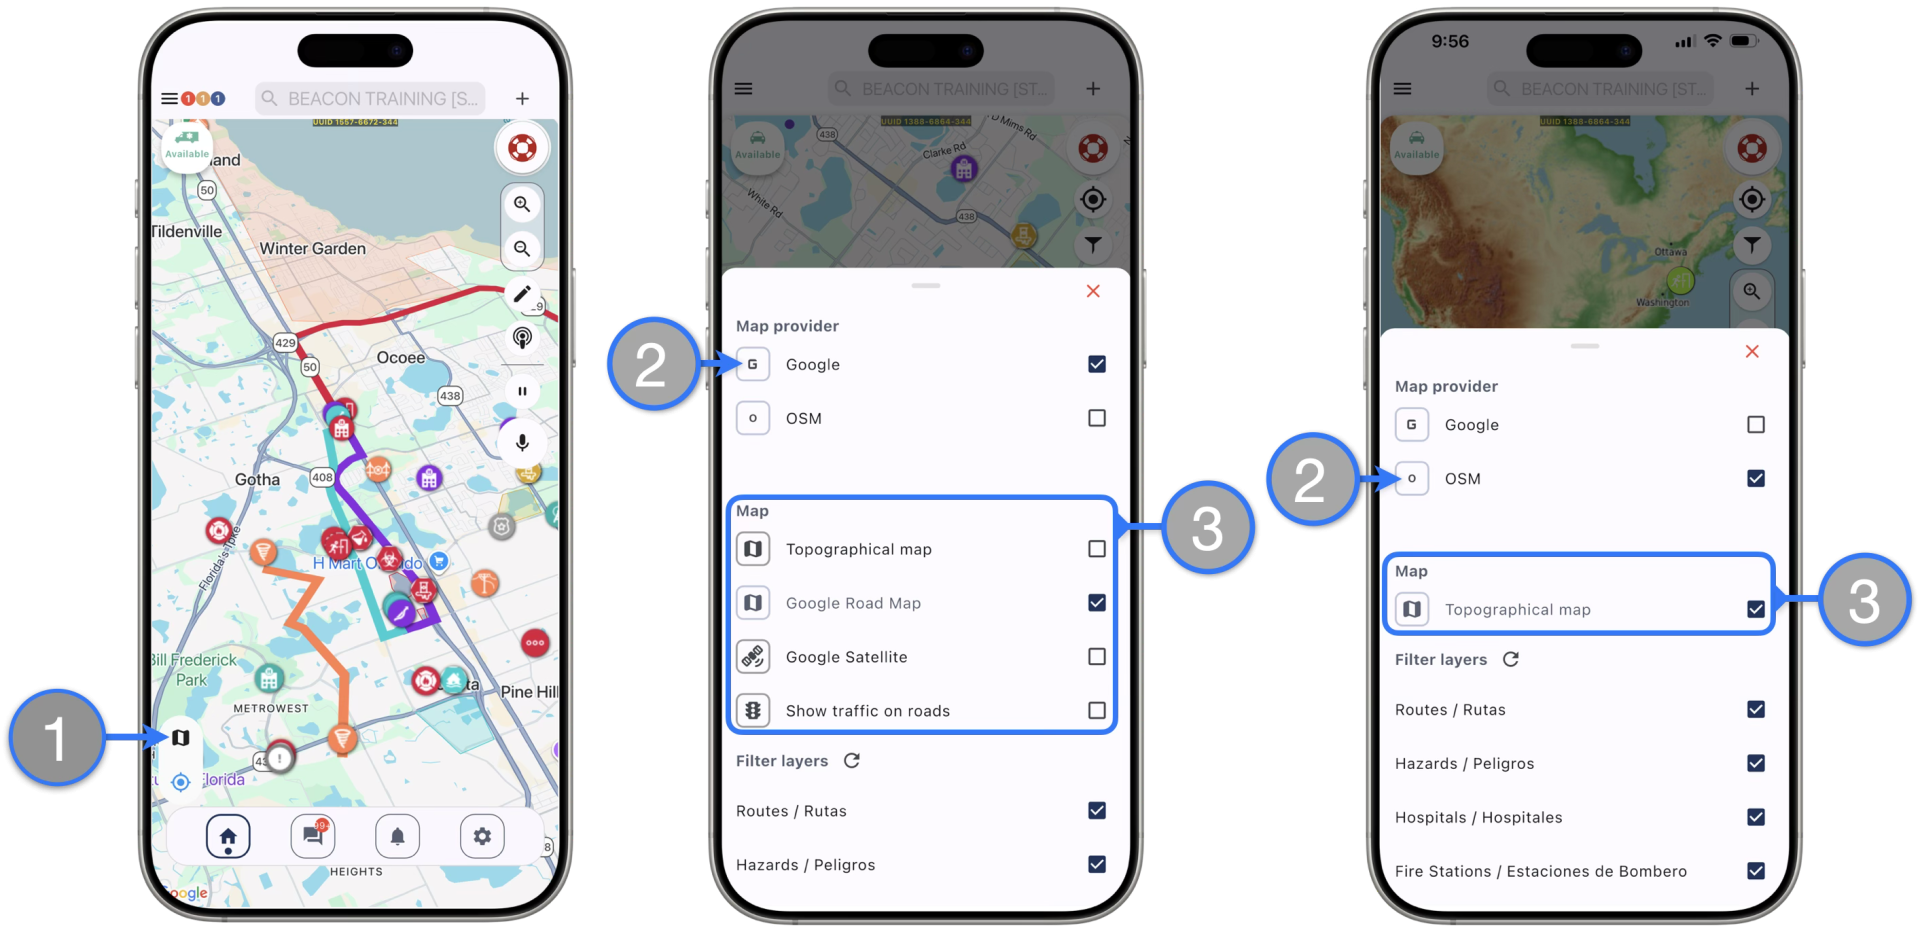
** Only Google Maps offers options for showing traffic patterns and and Satellite view.
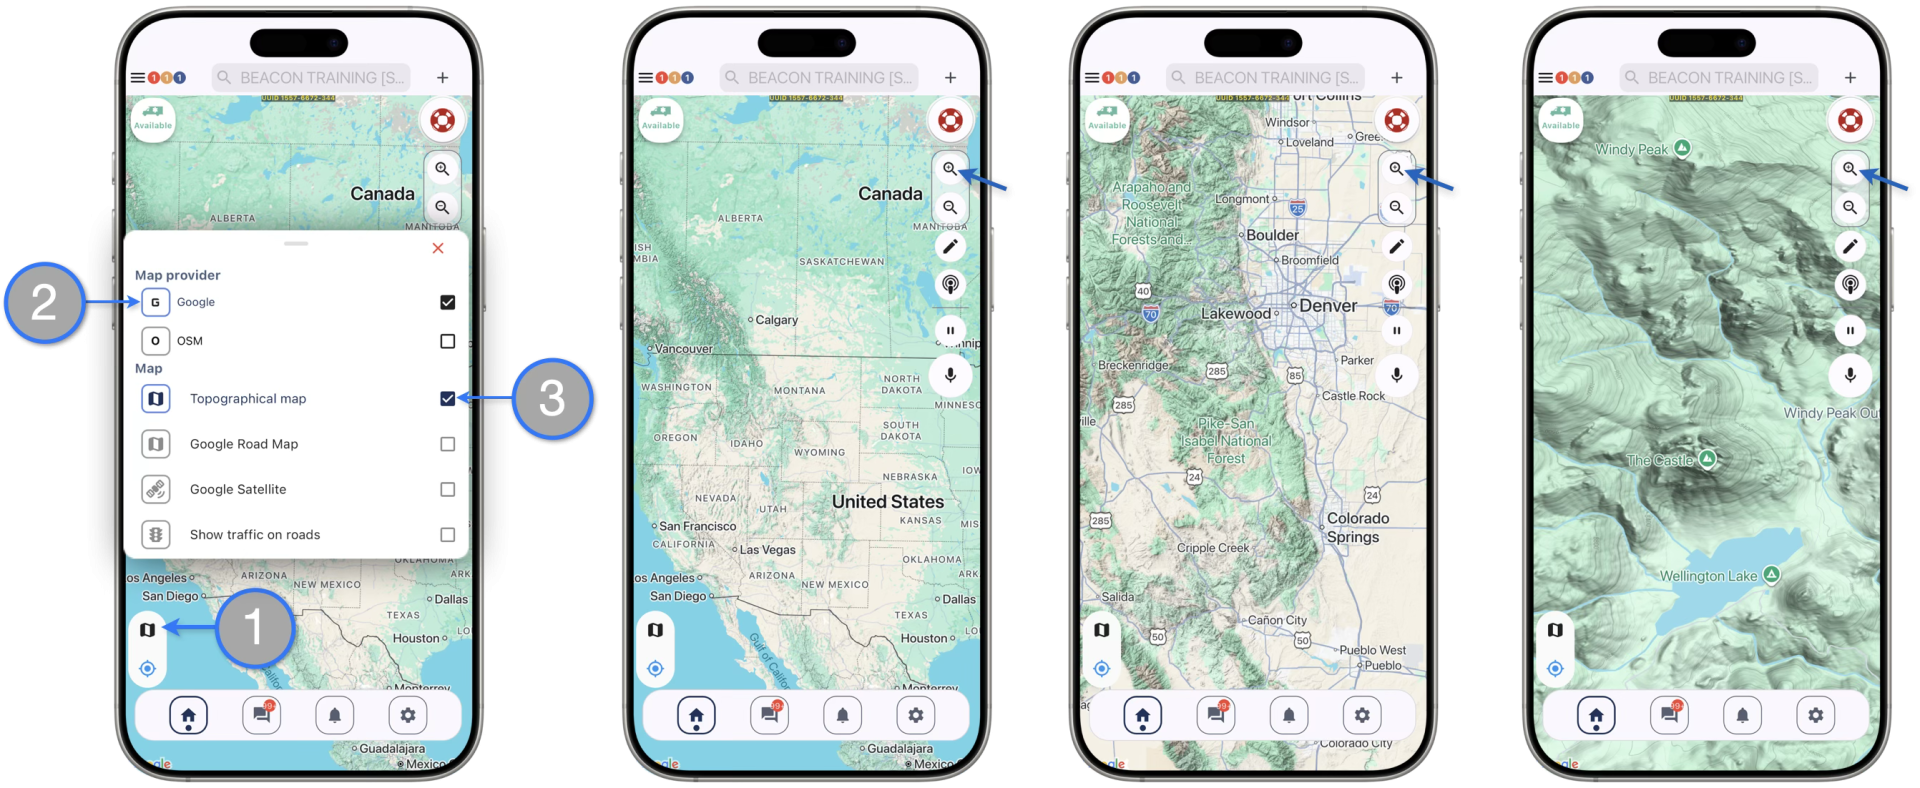
Topographical Maps are also available on the Mobile App:
- Press the Map Filtering icon on the Home Screen.
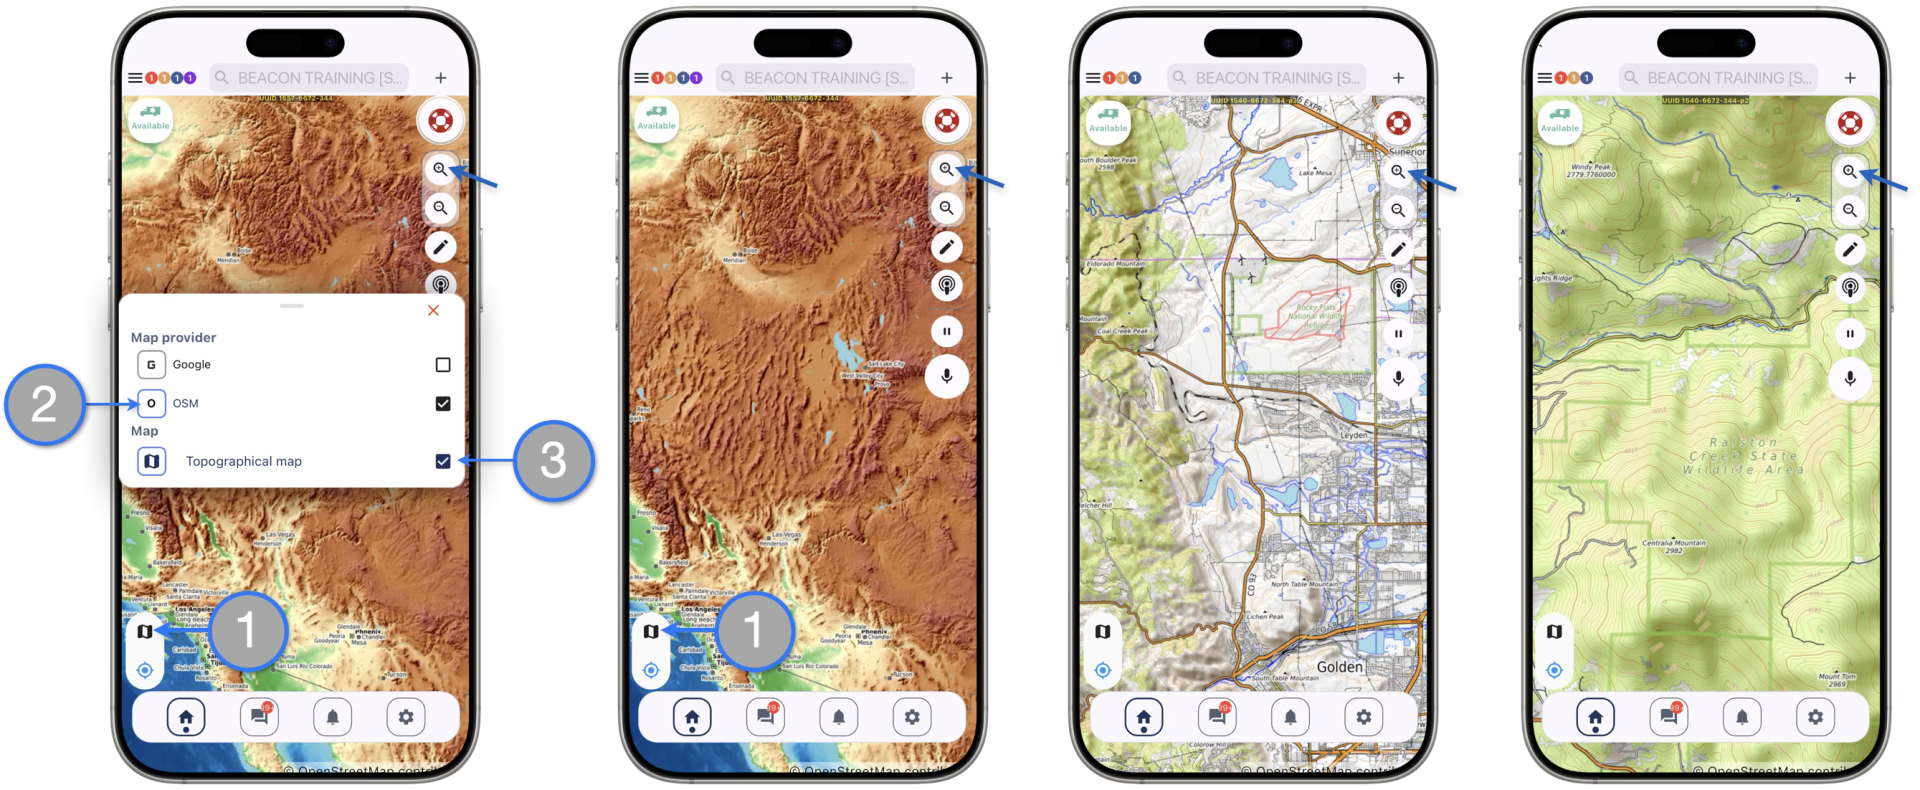
- Select the Map provider you would want to use.
- Check the box for Topographical map.
Google Terrain
OpenTopoMaps
Beacon is now introducing some Map Editing features to the mobile app.
![]() — This feature requires special permission. See all available Special Permissions and learn more here.
— This feature requires special permission. See all available Special Permissions and learn more here.
Responders who have been given the Map Editor permission can create landmarks, zones and paths map markers in a similar way it is performed through the Web Dispatcher interface.
To Create map Markers:

- Press the edit icon located at the right side of the screen.
- Press the plus symbol at the lower right corner of the map.
- Select what type of marker you would like to create
Landmarks are fixed points of interest including transport destinations (hospitals, clinics, shelters…) and other general markers (fire stations, ambulance headquarters, AED’s)
To create Landmarks:

- Click the Add Landmark button
- Find the desired location on the map by sliding the screen and click Confirm
- Select the Landmark Type
- Select marker Color
- Select the Map Layer you’d like the marker to belong
- Add the landmark Label name (required) and Comment (optional)
- Click Confirm to create the Marker
You can also follow these instructions to create Hazard markers.
Paths are linear routes that can be used to represent macro-level paths (e.g., hurricane trajectories, tornado paths) and/or micro-level paths (e.g., detours, evacuation routes, “hot spots”)
To create Paths:

- Press the Add Path button
- Press on the screen to add the starting point.
- Press other locations on the map to place additional vertices.
- You can delete the last placed vertex by clicking Remove Last Selection so you can place that point in a different location
- Click Confirm to finish the path
- Select the Path Type from the dropdown
- Select Color
- Select the Map Layer you’d like the marker to belong
- Enter the Label Name (required) and Comments (optional)
- Click Confirm to create the path marker.
Zones are polygons that represent areas of interest (e.g., flooding, catchment areas, hot/warm/cold zones).
To create Zones:

- Click the Add Zone button
- Press on the screen to add the starting point.
- Press other locations on the map to place additional vertices.
- You can delete the last placed vertex by clicking Remove Last Selection so you can place that point in a different location
- When you’re ok with the area created, pressing Confirm will finish the polygon and connect the first and last vertex
- Select the Zone Type from the dropdown
- Enter the Zone Label name (required)
- Select Color for the marker icons
- Select the Map Layer you’d like the marker to belong
- Enter Comments (optional)
- Click Confirm to create the marker